DIY Garden Pathways

Garden Center · Landscape Construction · Landscape Design

Pathways are a beautiful and essential feature of any landscape. Besides laying out a place to walk, they create a path for the wheelbarrow, save surrounding soil from compaction, and divide your garden into distinct spaces. With a bit of creativity, you can build pathways that are both visually pleasing and very practical. Let’s walk through the DIY options and lay out the steps to build them! 

The Mulch Pathway

Mulch pathways are one of the least expensive and simplest pathways to install. The first steps are to mark out the path and dig out some of the soil. Then, lay down some landscape fabric as an extra barrier against weeds, and fill in the mulch. Over time, you’ll need to replenish the mulch and remove any weeds that take root. Still, the mulch path is simple, practical, and a pleasing way to create a passage through the gardenhttps://www.stephenslandscaping.com/2022/12/26/creative-resolutions-for-your-moultonborough-garden-in-2023/.  

Stephens Landscaping Garden Center -DIY Garden Pathways-stone and gravel pathwayStepping Stones

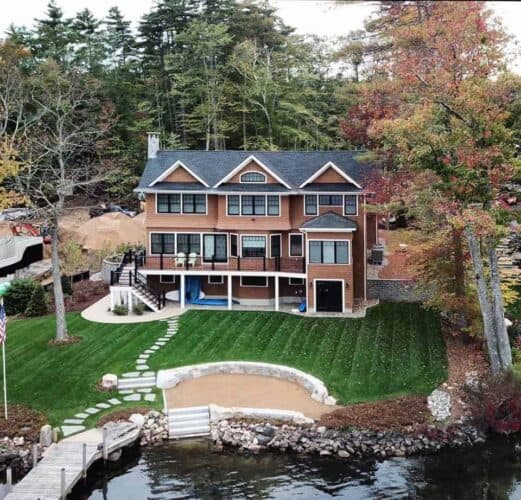
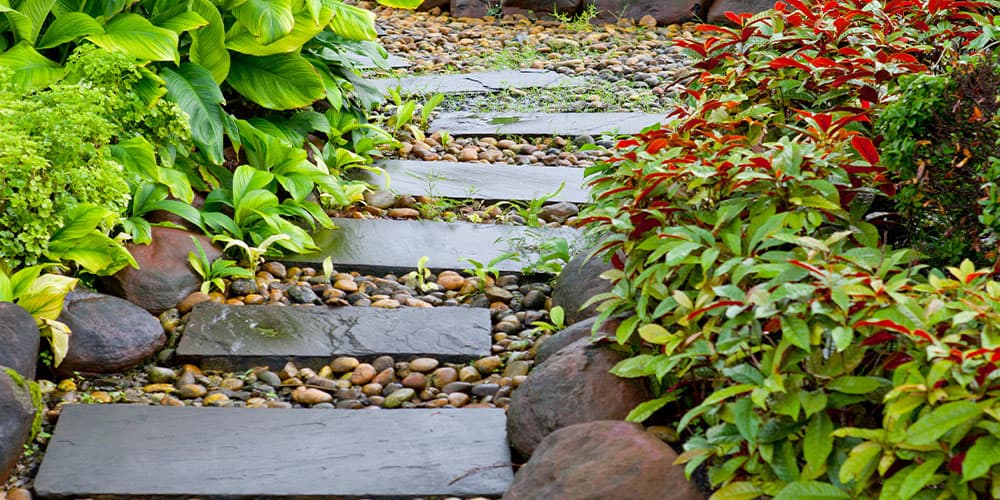
Stepping stones are another versatile DIY option and add charm and character to the garden. One option is to use evenly spaced rectangular or circular stones. Alternatively, natural-shaped flagstones lend a rustic look to your steps. 

No matter your choice, the steps for installation are the same. Mark out a path and place the stones in your preferred arrangement, keeping an equal distance between the center of each stone. Then, dig a place for each step in the ground. Lay down a level base of sand in each hole and tamp down the sand for stability before laying the stones in their final position. To finish, you can plant groundcovers or moss around the stones, which will beautifully frame the stones over time.

Pathways are a beautiful and essential feature of any landscape. Besides laying out a place to walk, they create a path for the wheelbarrow, save surrounding soil from compaction, and divide your garden into distinct spaces.

Gravel Pathways 

Besides mulch, gravel is the next easiest DIY option for smooth transit in the garden. However, to make a lasting pathway that is stable and free of weeds, you’ll want to follow the preparatory steps below. Because gravel tends to spread and get knocked into the surrounding areas, make sure you cut definitive edges, lay down plastic edging, or border the path with stones. 

stephens landscaping garden center - diy pathways -pathway with mulch around stonesFlagstones

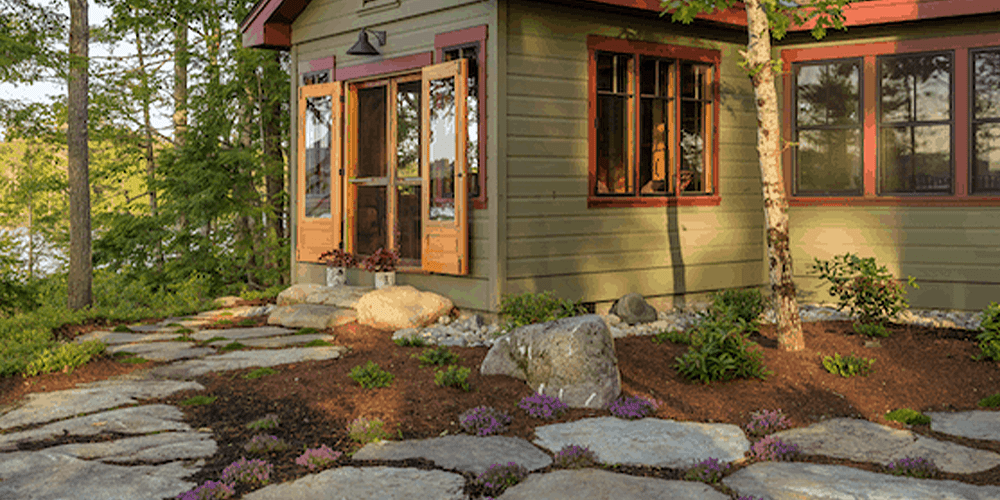
As already mentioned, flagstones form beautiful stepping stones. You can also use them in continuous pathways, where the stones are beside each other. These smooth, naturally cut stones create perfect imperfection. They’re durable, long-lasting, and age well over time. Follow the steps below to build a solid foundation for flagstone paths. 

Paving Stones 

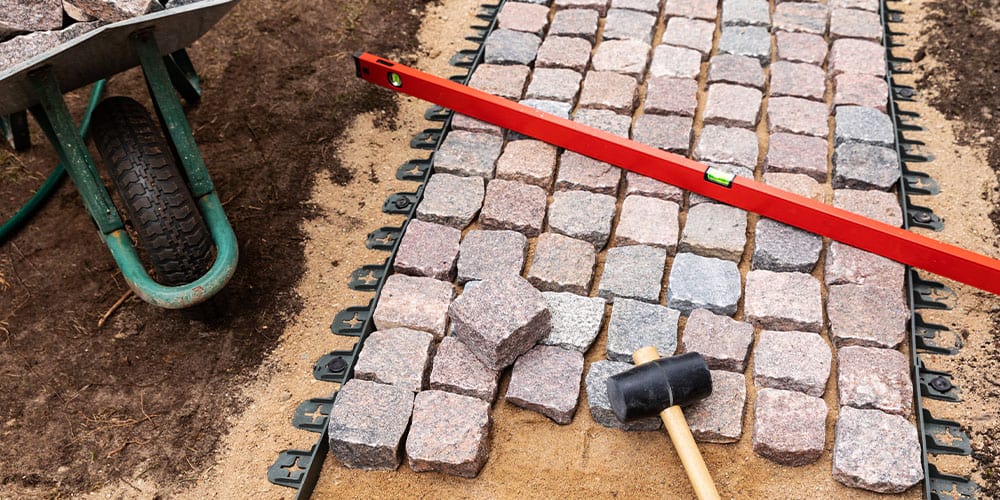
Pavers are interlocking bricks that form a solid and stable path. They are sleek, even, symmetrical, and lend a polished look to the landscape. You can choose both the color and the pattern of arrangement. Make sure to follow the steps below for a DIY approach that resists settling and remains level throughout the years. 

Stephens Landscaping Garden Center -DIY Garden Pathways-building a pathwaySteps for DIY Gravel, Flagstone, and Paver Pathways 

When making these types of pathways, you want to ensure you have a solid base. Here’s a quick guide to get you started:

  1. Mark out the path, using string to create straight edges. 
  2. Dig down approximately 6 inches into the ground. Note: a flat head spade comes in handy. 
  3. Fill in the bottom layer with loose stones or pea gravel; tamp them down, and cover with landscaping fabric.
  4. Fill another layer of sand, tamp down the surface, and level it. 
  5. Lay down the pavers, flagstone, or gravel. Tamp down the stones with a mallet to make them level and keep them in place. 
  6. To finish, fill between the cracks of the stones with sand and sweep away any leftovers on the surface.

Building a pathway is well within reach of the DIY gardener. When working with flagstone and pavers, remember to lay a solid base the first time so you don’t end up with sunken and uneven stones in the future. With that in mind, you’ll be well on your way to laying beautiful and functional garden pathways, no matter what style you choose. For more gardening and landscaping tips, feel free to follow us on Instagram or Facebook, or visit us in person in Moultonborough! 

Keeping Your Driveway Snow & Ice Free

Landscape Construction

Winter is a wonderful time to enjoy all that New England has to offer. Our abundant snowfall allows for all sorts of fun outdoor activities. But with the quiet beauty of snowfall comes something less enjoyable: clearing driveways and walkways full of snow.

Wouldn’t it be nice if you didn’t have to worry about clearing your passageways at all? You can have a driveway and sidewalk that stays clear of snow and ice by installing a radiant heating system under their surfaces. Many new houses are built incorporating heated driveways into their design, but installation can be done at existing homes as well.

Heating System Options

There are several options available to keep your driveway and walkways clear of snow: portable mats, a hydroponic (hot water) built-in system, and an electrical (wire grid) built-in system. We breakdown these systems, including installation details below:

Portable mats: These are the easiest and least expensive to install. It consists of portable mats that you lay down before any storm, wherever you want to keep snow from sticking and piling up. They come in a multitude of lengths and widths, so you can purchase mats to best fit your space requirements.

These are a good way to try out a heated driveway before committing to the time and expense of an installed system. The downside is that these mats must be placed before the snow comes and removed after the storm. They should be stored somewhere before the next use.

Hydroponic systems: If you are having a house built, the ideal time to install this system is before the driveway or walkway is laid. If you are adding this to an existing property, the driveway or walkway will have to be torn up, system installed and passageway redone.

This system uses tubing that is installed under the surface of your driveway and/or walkway. A warm, non-freezing water solution gets circulated through this series of tubes, and this solution is heated by a boiler that is usually located in the garage. This system is controlled by an automatic sensor or can be controlled manually. The driveway is then laid on top of this tube.

Electrical (wire grid) systems: Like the portable mats, these are a series of electrical wires that are meshed together in a grid pattern. These mats are embedded into the soil beneath the driveway, then paved over. Again, this is best done before the driveway is laid, but can be done to existing driveways if the driveway is torn up. Grids can be connected to cover the driveway completely, and this system is also controlled by a sensor that can be controlled manually or automatically.

Things to Consider

Apart from the initial purchase and installation costs, you should also be aware that heated driveways and walkways will incur operating costs each year as well. The boiler for the hydroponic system will use additional electricity or gas (however you heat your home) and the electrical grid system will increase your electricity usage.

If you install the hydroponic system, you’ll need to have the boiler inspected each year before the winter season begins, to keep your system in the best working order. While each system will likely give you 20 or so years of use, like any other mechanical system, breakdowns do happen, and you may need to do small repairs and maintenance over the years. If something really goes wrong, you may need to tear out part or all your driveway or walkway to repair the problem.

However, in weighing the pros and cons, having a heated driveway/walkway system to combat the snowiness of a typical New England winter is an absolutely excellent idea. Installing a heated driveway and walkways are wonderful ways to ensure the safety of your family and your visitors around your property this winter and will take away a lot of worry and fuss. You won’t have to find and rely on someone to plow and clear your property, and your driveway will be ready for you whenever you need to use it. You’ll increase the life of your driveway by not exposing it to great variations in temperature, or by being scraped by snowplows and shovels or corroding chemicals to melt ice and snow. And, you’ll increase the property value of your home.

We’d love to discuss the possibility of adding a heated driveway/walkway system to your home. Contact us, or give us a call at 603.707.0630.

Perched Beach Construction

Landscape Construction · Landscape Design

Adding a perched beach to your waterfront home expands your options for relaxation and entertainment as well as increases your property value. Installing a perched beach isn’t an easy task, but by getting guidance and following the State’s rules, you could be relaxing on your own private beach.

What exactly is a perched beach?

A perched beach is a sandy area that is at least 1 foot above the high-water line. It usually looks like a terraced area, with a retaining wall and steps leading from the water’s edge to the sandy area. These steps must stay 1 foot behind the high-water line. Perched beaches often need a back for supporting grade.

Love the idea, but not sure where to begin?

First, you’ll need a plan. There are many rules and regulations you’ll have to follow, so it’s best to work with someone who has experience in designing and installing perched beaches right from the beginning.

Then, you will need a Wetlands Permit from the New Hampshire Department of Environmental Services (NH DES). This permit will take at least 75 days for the State to review. It’s important to leave enough time for the process as the beach cannot be constructed without a permit.

What are some other considerations for the planning stage?

  • Your beach and other water access structures cannot be more than 20% of your shoreline frontage, so if you have 100 feet of contiguous shoreline, your beach can only be 20 feet wide, and this also depends on other existing features.
  • Be aware that you can’t build a perched beach on a slope that’s greater than 25%, calculated from the high-water line to the back of your proposed construction. However, your beach itself must be flat, and have no slope to it at all, which will minimize any runoff into the lake.
  • You’ll also want to locate your beach in an area that will impact the environment the least, where you will have to remove the least amount of vegetation, and where animals, birds, amphibians, etc. do not nest. Your beach cannot contact the water’s edge at all, and you can’t dredge the lake bottom and/or add sand to the lake for any reason.
  • Your plans must include ways to divert surface runoff around the beach to allow for sand erosion during storms.
  • Your perched beach must be 10 feet from property boundaries, unless you get permission from all effected abutters.
  • During construction, you can’t have any machinery in the water, and you can’t move any boulders along the shoreline, except to build the steps to your beach.
  • You can only use 10 cubic yards of sand on your beach, and it must be clean sand. You can only replenish this sand once every six years.

These are some of the basics to get you started with designing your own perched beach area; there’s a lot more to this process. For more information, you can contact the NH DES Wetlands Bureau by phone at (603) 271-2147, via email, or by mail at 29 Hazen Drive; P.O. Box 95, Concord, NH 03302-0095.

Let us help!

The team at Stephens Landscaping Professionals has experience in designing and installing perched beaches. Below are just a few pictures from some of the projects we’ve completed.

We’d love to help you create a beach that truly enhances your lakefront home. Reach out or give us a call at 603.707.0630.

If you’re interested in learning more about how a perched beach may improve your home’s value, contact our friends at Lake Life Realty, who will be happy to provide more information about what they have seen in their experiences around the lake.