Soaking Up Winter

Landscape Design

While winters can be rough in New England, there are ways to enjoy being outside while staying warm. One of the best ways to do this is to soak and relax in a hot tub or spa.

Installing a hot tub or spa is a great way to get more use out of your outdoor space, and with a little bit of planning, it can add both year-round usefulness and a beautiful point of interest into your landscape. Soaking in a hot tub or spa is a great way to relieve stress and anxiety, as well as entertain guests and have enjoyable and memorable family time.

What’s the Difference?

While in the United States, we tend to use the terms “Spa” and “Hot Tub” interchangeably, they actually are different.

  • Spas are usually built-in structures that provide some type of water therapy treatment. Modern spas have molded seating and jets. Around the world, heated pools have been used as spas for generations.
  • Hot tubs are used mostly for fun and relaxation. They also have jets, bubblers, and their own heating and controls. They may have other extra features as well. Hot tubs are usually portable and can be placed on decks and in back yards.

Where Does it Go?

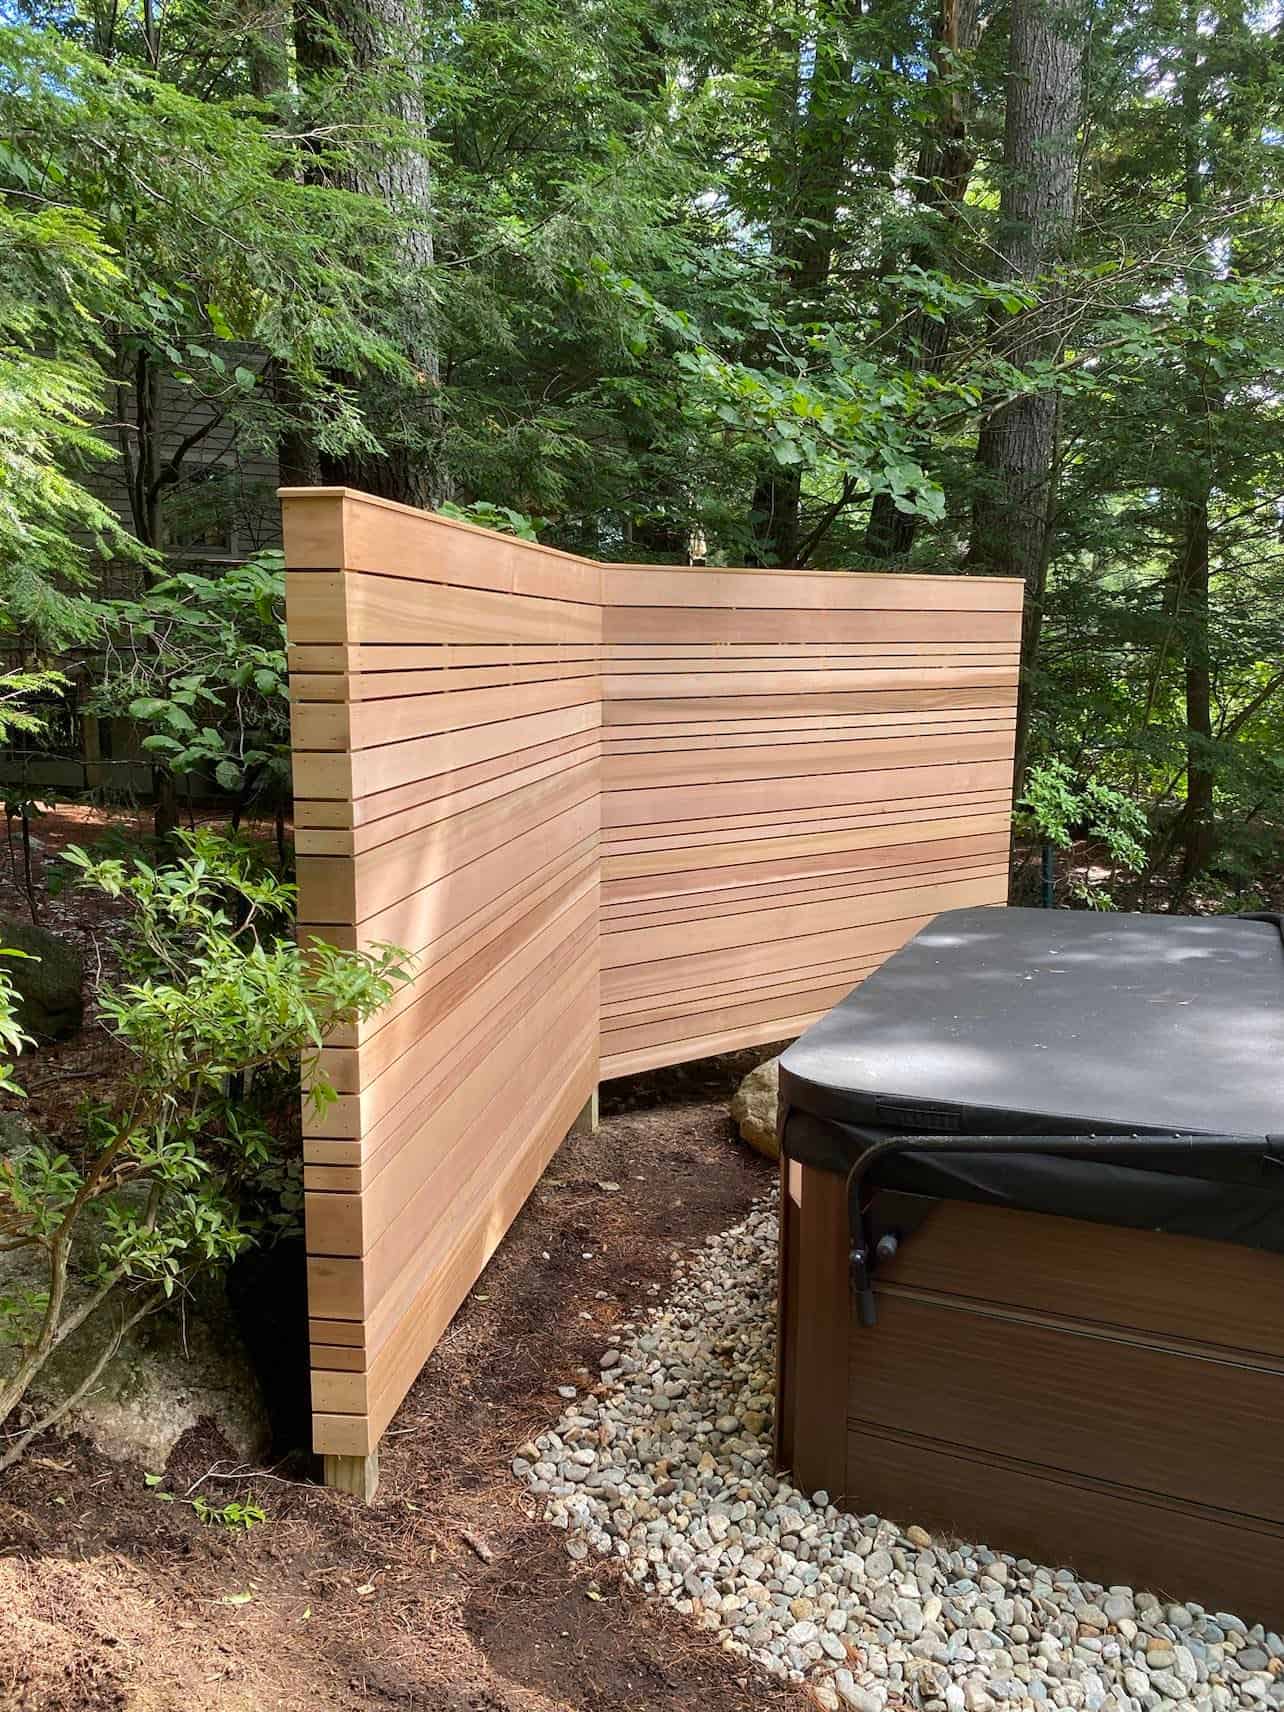
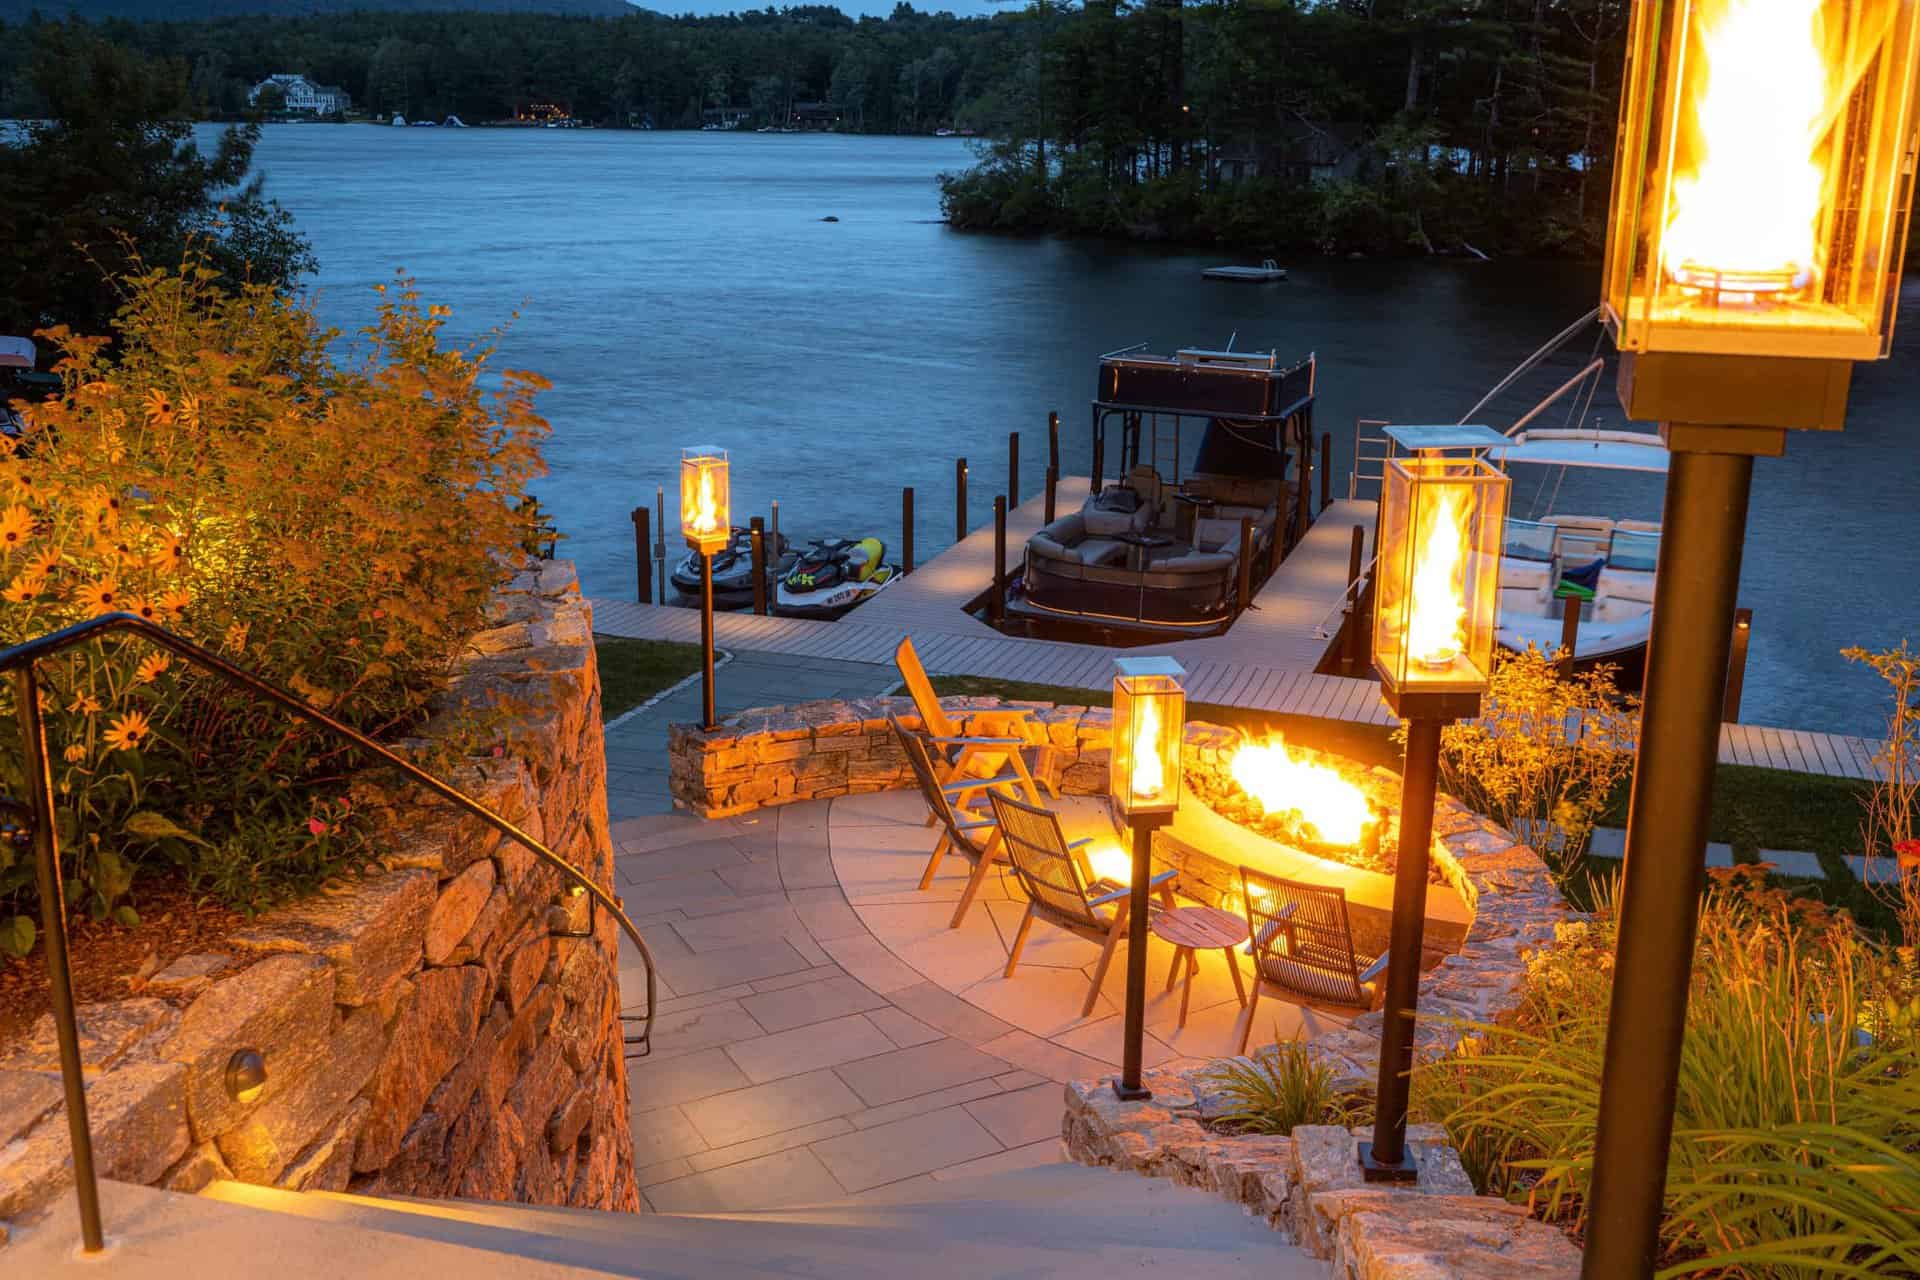
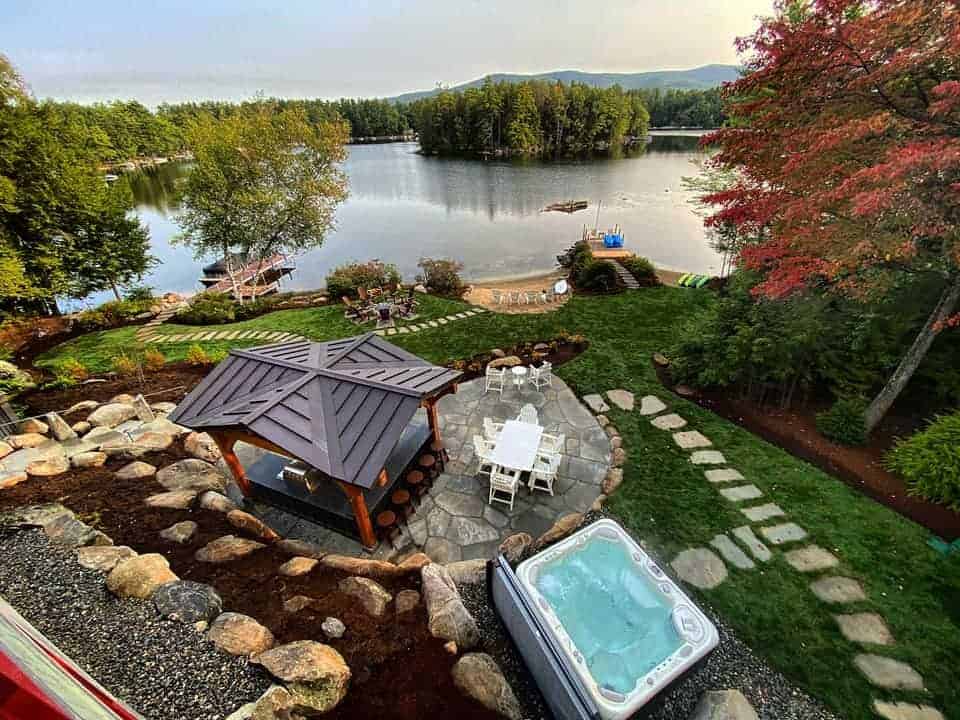
Adding a hot tub or spa to your property does require some planning. They can be built directly into a landscape or installed above ground, but either way you’ll likely want to position in a way that allows for privacy. You should consider placing it where you’ll also have a great view. The view could be out over your property, across a water feature, or offering a clear view of the open sky. Since you’ll also be using the hot tub or spa during the winter, place it where it’s out of the wind. You can locate your spa or hot tub under a pergola, on its own patio near an entry door, or incorporate into part of a deck.

Above ground hot tub and spa options are popular and more budget-friendly than built ins, although they can be designed in a way that makes them feel built it and incorporated into an outdoor space.

If you are thinking of putting your hot tub or spa directly on your deck, you’ll need to consider the weight of the unit, as well as the added water; your deck may need to be reinforced. One option you may consider is to cut your deck and recess the tub, so the top is level with the deck’s surface. This will give you a built-in look, and if you ever remove the tub, you just have to replace the deck boards.

There are various different sizes, shapes, and design options to best fit with your surrounding landscape, making it most functional and inviting within the outdoor space.

The hot tub or spa will need to be close to your house because you’ll want a short walking distance back to warmth when the weather is cold. It can also be surrounded with electric heat so that accessing it during the winter months becomes easier and more comfortable.

Your tub will need to be near a water source, for easy filling as well as near an electrical outlet for a source of power. You need to be able to drain the tub for regular cleaning as well, so make sure to consider where the drained water will go.

Fit a Tub to Your Space and Lifestyle

Hot tubs and spas come in a variety of shapes, like triangular to fit into corners, rectangular or oblong for large spaces, and round for smaller spaces. Hot tubs and spas can fit one or two people, or as many as six or eight; it all depends on your plans and the space you have available.

They can be customized to enhance the design of your outdoor space, or your desired experience. Since the interiors are molded, there is a variety of color options from which to choose: Whites and silvers invoke a feeling of tranquility; tans and beiges will give you a sandy, beachy feeling; and blues and turquoises will remind you of Caribbean waters.

LED lights can create a mood and are changeable, and audio speakers can add to the overall ambiance.

Adding a hot tub or spa will add another way to enjoy your outdoor spaces, and spend more time outside in the winter. We’ve helped many homeowners add both built-in spas and above ground hot tubs to their properties, and we’d love to help you add one to your own landscape. Please call us at 603.707.0630 or reach out over email to get started.

Rain is Here to Stay

Landscape Design

Fall and winter in New England produce a lot of rain and snow. All that water will make its way down our roofs, through our gutters and drainpipes, across our lawns and driveways, out to the street, into our municipal water supplies, and out into streams, lakes, and oceans. With that water unfortunately comes pollution, however unintended.

As homeowners, is there anything we can do to mitigate the damage unclean stormwater can do to our local environment? As a matter of fact, there’s an easy and beautiful way to both clean the water and add beauty to your landscaping—install a rain garden!

Rain gardens can be a lovely and cost-effective way of “going with the flow”, pardon the pun. A rain garden can add a focal point while also serving to reduce and clean stormwater runoff from your property and possibly alleviating possible future water problems, like water in your basement, if installed correctly.

What is a Rain Garden?

A rain garden is a dip or indent in the ground that where plants are sown; this garden area is specifically designed to collect, treat, and filter stormwater runoff. Because these gardens are sunk lower than the lawn, the dirty runoff water collects there instead of running directly into the street, and is absorbed slowly into the dirt, and/or filtered by your plants.

Where Should I Put My Garden?

A rain garden should be at least ten feet away from your house, to keep it away from your house’s foundation, and at least fifty feet away from any septic system or well. If you are unsure about the quality of your soil, a good test is to dig a hole about twelve inches deep and pour water into it; if the water disappears within twenty-four hours, the soil is the perfect quality to host a rain garden.

Rain Garden Planting Areas & Plant Suggestions

When considering plants for your rain garden, remember you’ll have three areas to consider:

  • The edge: This is the top of the rain garden, where there is a mound of dirt. This is the highest point. You’ll need to select plants that prefer drier conditions here. Some plant ideas include:
    • White Turtlehead: They prefer dry soil and pollinators love them
    • Hairy Beardtongue: These delicate blooms attract hummingbirds and butterflies
    • Butterfly Milkweed: These tiny and lovely orange flowers are long blooming
  • The slope: As its name implies, this is the part that goes downward from the top of the edge to the bottom, and out from the middle to the edge. Choose plants that can handle both moisture and dry conditions.
    • Wild Bergamot: This striking flower adds color and attracts pollinators
    • Bottlebrush Grass: This wispy tall grass is perfect for providing texture and visual interest
    • Blue False Indigo: This perennial bush will add deep blue flowers to your garden
  • The base: The bottom is the most wet part of the rain garden, and plants here need to be able to survive the wettest conditions.
    • Astilbe: Choose pink, red, purple, or white moisture-loving perennials
    • Swamp Rose Mallow: Large, showy blooms make a great centerpiece for your garden
    • Winterberry: The bright red berries will add welcome color to your garden throughout the winter months

For more helpful information on rain gardens, we recommend clicking here!


One Last Consideration

While rain gardens are relatively easy to install, an improperly installed one can cause problems with drainage—the thing they were designed to help alleviate. We’ve helped many homeowners add rain gardens to their properties, and we’d love to help you add this functional beauty spot to your own. Please call us at 603.707.0630 or email us to get started.

Fencing Yourself In

Landscape Design

In his poem, “Mending Wall”, Robert Frost pondered the notion that “Good fences make good neighbors”. While the poet seemed to waver on the need for the fence, his neighbor steadfastly supported the need to upkeep the traditional wall between properties, to keep things friendly between them. We tend to agree with the neighbor; a fence can act as a good, clear line of distinction that can clear up any confusion, stop disagreements before they happen, and improve the appearance of most properties.

Throughout time, homeowners have chosen to surround their property with some sort of fence. Some fences were built for privacy, some for security, and some for purely aesthetic reasons; there are as many reasons to surround your property as there are designs and fencing materials from which to choose.

The Whys of a Fence

When you consider installing a fence around your entire property, or just a segment of it, you first must consider what the main purpose of the fence will be. Will this be a privacy fence, to block the view of your property from neighbors or passersby, or do you not want to see the neighbors or the roadway by your house? Do you want to add a level of security to your entire property? Maybe you just want to fence off a segment of your property to designate a certain space, secure a pool or keep a child or pet safe. Or perhaps you have wildlife in the area you’d like to deter from your entertainment spaces, landscaping, or gardens. Will your fence be mostly decorative, a way to finish the overall appearance of your house and yard?

Of course, you can have a fence that does all the above: a decorative fence that gives you both privacy and security. You can have a decorative fence in your front yard for maximum curb appeal, and a fence that offers more security and privacy in your backyard.

Once you decide on what you want your fence to do for you, your next step will be to choose what you what your fence to look like, and that includes what materials the fence will be made of.

Fencing Materials

There are so many options from which to choose when thinking about fencing for your property. We’ll highlight some great options for you to consider:

  • Wood: Wood has been the traditional choice of fencing for generations. The style of fence and decorative choices are unmatched, as are choices of woods available. Some woods work better in different climates; here in New England, cedar is the most popular choice. You can mix and match what kinds of wooden fences would best with your property. Front yards can have picket fences, and while back or side yards can have a slat-style fence for more privacy, for example. Wood fences will need to be kept on a regular maintenance schedule to prevent rot, pests, and warping.
  • Vinyl: This fencing looks great and is a good choice for both security and privacy. It can be used for both the front, back, and side yards. It comes in a variety of styles and colors, and gates can be added wherever needed. Vinyl fencing is low maintenance and long lasting.
  • Masonry: This type of fencing has literally stood the test of time. Drive anywhere in New England, and you will see stone walls, even in forests where properties once stood. Masonry walls can be built from brick, stucco, stone, and concrete. They will boost curb appeal, and can create private, secure yards.
  • Composite: Fences are made from panels that are a mix of wood, resin, and plastic. They provide security and privacy when used as tall panels, and a decorative touch when used in shorter panels. These panels come in a variety of colors and can look either like wood panels or natural stone. They are low maintenance and are not vulnerable to rot or pests.
  • Wrought Iron: Mostly used in front yards, these fences are highly decorative, and add a distinctive touch to your property. They are heavy, durable, and add security; they will not be pushed over easily and can withstand most weather. They are customizable and can match your landscaping. However, they are prone to rusting.
  • Aluminum: These fences come in a variety of styles and colors. They add security, but not much in the way of privacy. They will not rust, and do not require much maintenance, and are a popular choice for pool/kid/playground areas.

What Fence is Best

Only you can decide what fence or combination of fences is best for you and your property. Ideally, the fence you choose will add to the curb appeal of your property, provide safety for your family, including your pets, and give you a sense of safety and privacy. The fence will allow you to enjoy your home and surrounding landscape more fully, without you even giving it a second thought.

We’ve helped many homeowners design fence plans to add to their properties, and we’d love to help you come up with a plan of your own. Please call us at 603.707.0630 or email us to get started.

Falling in Love with Fire Features

Landscape Construction

Fall is arguably the most beautiful time of year in northern New England, and so it makes sense that many of us want to extend our time outside and enjoy the great weather, beautiful foliage, and cool nights that this season brings.

One way to add to the enjoyment of staying outdoors as the temperatures dip is to add a heating element to your outdoor spaces. You can add a decorative touch as well as a heating option by choosing a fireplace or fire pit. Both are wonderful additions to your outdoor areas and put out about the same amount of heat but have different things you should consider.

A Heated Focal Point

When you install a fireplace or fire pit on your property, it becomes a focal point of your landscape and a natural gathering spot that’s perfect for entertaining and socializing with family and friends. It’s a casual place to hang out and chat or unwind after a long day. It’s easy to sit around a fire and sip cocktails or roast marshmallows to make s’mores (or both!).

A fire element adds warm tones of light to your landscape and provides a good “wall” at the end of a patio or seating area, especially if you install a fireplace. A fire pit can help you create a new seating or conversation area if you want to break up a large expanse of lawn or use a previously unused/underused corner more efficiently. A more permanent fire element, like built-in fireplaces or fire pits, can increase your property value as well.

Fireplaces

By matching or complementing existing masonry to your fireplace addition, you’ll extend your patio and entertainment space. You can opt for a wood-burning fireplace, or if you already have gas as a heating or cooking element in your house, it’s not difficult to have a gas line run outdoors for a fireplace. When installing an outdoor fireplace, just make sure to build one with a large enough chimney to be able to get a good draft for ventilation.

Firepits

Sitting around a fire pit evokes almost the same feelings as gathering around a summer bonfire on the beach or a campfire in the woods. Usually circular or square in design, a fire pit allows people to gather around all sides. Fire pits can be portable or built into patios as a permanent fixture.

Fire pits have several options to fuel their fires. Wood is traditionally used in fire pits and provides a nice flame and heat. With open wood fire pits, wind is a consideration. When placed in a windy location, the smoke produced by traditional wood burning fire pits can shift onto you, your guests, or toward your house at times. Debris and dirt may be more visible, and you may need to drain rainwater from it often. With wood, you’ll need to have storage nearby to keep your wood dry.

Great Fire Pits

If you are warm to the idea of wood-burning fire pits, there are some smoke-free options. Two companies we recommend are:

  • Solo Stove: This portable firepit offers a great burn with almost no smoke. It’s designed to maximize airflow and has air vents placed in strategic areas. You may get a little smoke when lighting or putting out the fire, but that’s about it. The trick is to keep wood below the secondary air vent and not overfill it, then you’ll enjoy a great fire without being bothered by smoke.
    Their stainless-steel design fits well into any décor and allows for easy cleaning. They also offer a lifetime guarantee from any manufacturing defects. Solo Stove also makes a matching pizza oven.
  • Breeo fire pits are another company that offers smokeless, portable fire pits. Breeo’s pits come in several design, glass, and color options. You can even custom design your fire pit on their website, so it’s built to your own specifications. Breeo’s fire pits are smokeless due to raised air vents on the bottom of the pit, enabling oxygen to feed the fire regardless of ash build up. Their double-walled build allows hot air to enter from vents at the bottom and escape at holes in the rim at the top. This escaping air causes a secondary ignition of flames, burning off the rising smoke.

Breeo also offers accessories like fireside furniture and implements you can use to cook directly on the flames themselves. As with all fire pits and fireplaces, make sure to clean all debris, drippings, and food particles completely off before relighting the fire.

Other Fuels for Fire Pits

Propane and gas fire pits are other options for fueling fire pits if you don’t want to bother with wood. Both gas and propane fire pits have instant ignitions, so you don’t have to mess about getting a fire started. And both can be shut down instantly without waiting for flames to die down or embers to cool.

There are no sparks emitted from a gas or propane fireplace, so these types of fire pits can be a safer option. To avoid carbon monoxide build up, both gas and propane fire pits must be used in well-ventilated areas.

We’ve helped many homeowners add a fire and heating element to their landscapes and outdoor entertainment spaces, and we’d love to help you come up with ideas to incorporate a fireplace or fire pit into your property. Please call us at 603.707.0630 or email us to get started.

Fall into Planting for Spring

Planting

When winter gives way and spring is on the horizon, many of our thoughts turn to our gardens, lawns, and planning what to plant in the coming year. But, from a landscaping perspective, fall is a much better time to plant anything but annuals or plants too delicate to survive our cold winters.

It may seem strange to plant when the usual growing season is winding down, but by planting in the fall, you’re giving your plants a better chance of survival. Then in the spring when your plants start to grow, you’ll be ahead of the game and your landscaping will look great in a shorter period of time.

Why plant in the fall?

When plants grow in the summer, many factors—hot temperatures, varying humidity levels, drought, or occasional periods of heavy rain—tend to add stress to plants. In the fall, the soil is still warm enough to nourish growing plants, and the more moderate temperatures and increased rain will give your plantings a healthy, stress-free start.

The cooler air temperatures in the fall mean that the plants will not waste a lot of their energy growing upward. Instead, they will focus their energy downward, establishing strong root systems before going dormant in cold weather. When spring arrives, your plants will already have a strong foundation from which to grow, making them hardier for the growing season, and giving them a better chance for survival.

As you’ve watched over your lawn and gardens through the summer, you’ve undoubtedly lost some plants or found some trouble spots. Autumn is a great time to work on those problem areas.

It’s also the perfect time to add shrubs and trees specifically for winter interest, and add a bit of color to our usually stark and colorless landscape. Trees like basswood/linden and spruce trees prefer to be planted in the fall and do really well in cold weather. A hawthorn tree will produce beautiful white flowers in the spring, and by planting a maple tree, you’ll get beautiful colors on the leaves next autumn. The Japanese maple, a garden favorite, does best when planted in the fall. Really, most any tree or shrub that will grow in our New England environment can be planted in the fall, and these trees prefer to have the extra time to root themselves deeply before the summer growing season.

As for personal comfort level, planting in the fall is a bit more pleasant as the cooler temperatures make it easier to work outside on your property without the bright sun and high humidity of summer months. An added bonus to working in the garden in the fall is that fewer weeds will grow, and there will be fewer insects and pests to deal with.

Planning for Spring Beauty

There are a great variety of things you can plant now to give you early pops of color in your spring yard. Plants like tulips and hyacinths need cold temperatures before they will bloom; crocuses, winter heath, and snowdrops will bloom through the snow. Lilly of the valley and bleeding hearts will add early color to your garden, as will peonies, pansies, and violets. If deer are a problem, consider planting things that deer do not like to nibble on, like grape hyacinths, daffodils, or anything from the allium family.

If you’d like to add a bit of greenery to your landscape, select a cold-season turf to help the bare or brown spots in your lawn, or add trees and shrubs to your property for added interest.

Plan to get all plantings in the ground about six weeks before the usual date of first frost, and mulch your plants before the nights get too cool, which will protect your plants even further. And all your landscaping needs a good fertilizing this time of year to get it ready for winter, so be sure to add a little extra to your new plants for some TLC.

Extending the Season

If you are not quite ready for the growing season to be over, there are some plants you can plant in the fall that will be ready to harvest until the winter, and even through the cold months. (Just make sure to plant them six weeks before the first frost.) Some cold tolerant plants that can be grown in our zone include:

  • Lettuce (it can grow after a little snow or frost)
  • Broccoli
  • Cauliflower
  • Spinach
  • Carrots
  • Cilantro
  • Turnips
  • Peas
  • Radishes
  • Kale (will grow all through the winter)

Let us help you prepare your landscaping for fall and the growing seasons beyond. Give us a call at 603.707.0630 or email and we’ll work with you to come up with a plan to get ready for spring and beyond.