Debunking the Poinsettia Myth
It’s time to discover the truth about poinsettias. As it turns out, they’re not as toxic as we thought, not always red, and arguably not even flowers—at least not in the parts we thought. It’s time to cut through the myths and learn the fascinating facts and history behind these beautiful, harmless plants! Here are […]
How to Grow a Garnish Garden in Your Kitchen
One of home gardening’s sweetest pleasures is enjoying a bouquet of freshly-grown herbs whenever you like. Although the plants themselves may be small, the freshness, flavor, and satisfaction they bring to your home cooking is immense. As it turns out, you don’t need to say goodbye to them when winter comes to New Hampshire. With […]
Fabulous Holiday Porch Pot Designs for Moultonborough
The end of the growing season in New Hampshire doesn’t mean the end of beautiful planters. On the contrary, holiday planters are the perfect way to decorate your porch this Christmas and beyond. The weather may be too frosty for flowers, but we can still make fabulous seasonal arrangements using evergreen boughs, berries, bells, ribbons, […]
How to Attract Birds to Your Garden in the Winter
As the seasons shift, some birds in New Hampshire fly south for winter, others stay, and still others that breed in more northern places migrate here. Attracting these feathered friends is not only a great pleasure for us, but provides important food, shelter, and water for them during the cold months. Although boosting the bird […]
How to Protect Your Trees from Cold and Salt Damage
Salt damage, winter burn, frost heaving, and hungry rodents are just a few of the challenges our trees have to contend with during the winter. Although most trees we grow in New Hampshire are experts at living through the cold months, we can still help them overcome seasonal challenges, so they thrive next year—here’s how! […]
Prune It or Leave It? A Guide to Fall Pruning
There’s nothing like a warm autumn day to beckon us outside to finish the garden tasks for the year. Pruning may seem like a natural addition to the fall checklist, but before you take out the pruning shears, it’s important to know which plants, if any, need to be pruned—and which ones to leave! Should […]
Everything Your Moultonborough Garden Needs Before Winter
Songbirds flying south, trees dropping leaves, insects preparing for hibernation—all around us, the ecosystem is getting ready for winter. Likewise, it’s time to prep our garden and lawns for the months ahead. Here’s a guide to give your landscapes enriching fall care, whether you plan to leave for the off-season or live in New Hampshire […]
How to Anticipate the Frost in Moultonborough
Fall has arrived, and with it will soon come frost. We never know when it will come exactly, but it doesn’t have to take us by surprise. Here’s how you can anticipate the first frost, so you can save your plants and prepare for winter effectively! Step 1: Know Your First Frost Date The first […]
Elevated Fall Decorations for Your Front Porch
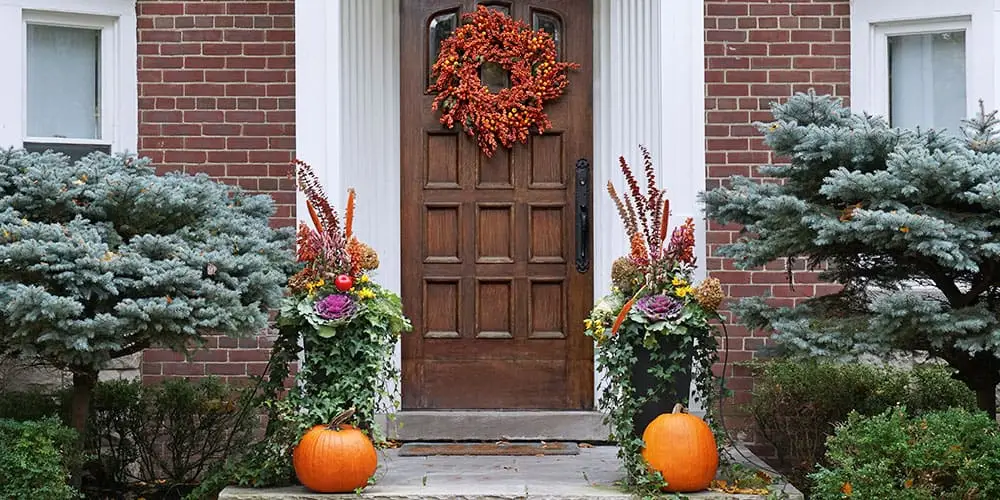
Autumn is one of the most breathtaking and beautiful seasons in New Hampshire. We can recreate a taste of that beauty right at our doorstep by decorating our front porch with a fall display. Your yard is brimming with colorful plants to use, fall annuals are blooming, and the farmer’s markets are loaded with the […]
How to Use Compost in Your Garden for Maximum Benefits
Compost has endless benefits, from retaining nutrients in the soil to protecting plants from disease. You can use compost in your yard in many ways; it is an excellent additive for crops, and your flower beds and trees can also benefit from enriched soil. The Benefits of Adding Compost to Your Garden Beds in New […]