Keeping it Green

Landscape Maintenance

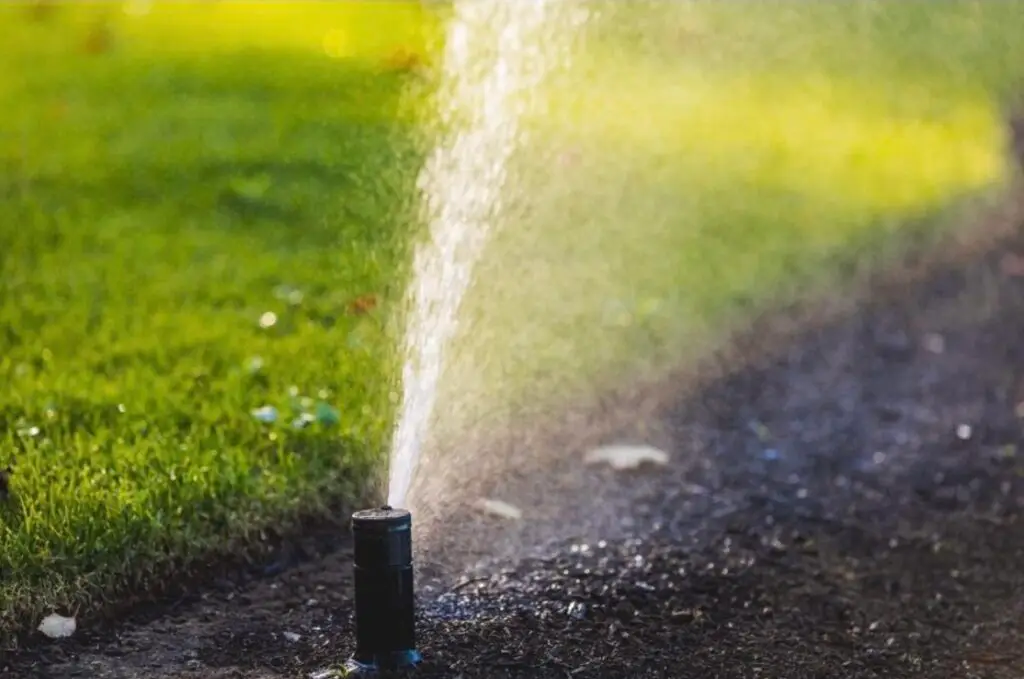
We’re well into the hottest part of the summer now, and our lawns, plantings, and gardens are looking very lush and healthy. Unfortunately, August is when droughts usually occur in New Hampshire, so it can be a struggle to keep our lawns looking green and our gardens well-watered. But with a little care, a well-designed irrigation system, and a carefully thought-out watering schedule, your lawn, plantings, and garden will survive the heat of late summer and thrive even into the late fall months.

Water, Water Everywhere

There are a lot of things to consider when planning to install an irrigation system on your property, such as water pressure, water volume, positioning to prevent run off, etc., that’s best left to professionals, but in this blog, we’ll discuss some basics to help you make an informed choice when considering what’s right for you and your property.

There are two types of irrigation systems for landscapes, sprinkler irrigation and drip irrigation, and a well-designed irrigation system usually includes both kinds, as they serve different purposes. Both systems will have pipes buried under the lawn and garden to supply water to your lawn, garden, shrubbery, and trees.

Sprinkler irrigation systems are the watering systems we are most used to seeing in lawns and in gardens. They shoot out water to small or large areas of lawns or plantings. They pop up when needed, and retract when not in use, to be out of the way of lawn mowers and people, and to keep the property from looking unsightly.

  • Rotary sprinklers are high pressure heads that pop up and rotate to cover a large area when in use. They are adjustable and can cover arcs between 20 and 360 degrees.
  • Spray heads disperse a lower volume of water and are made to cover a smaller area of land. They spray water in a circle, but do not move. They work well if you want to water a specific area or planting.

Drip irrigation is used most often in vegetable gardens and amid plantings like shrubs, trees, and flower beds. This process involves soft hoses with have tiny holes, and water leeches out at a slow and steady pace. It’s a very efficient watering system, as it slowly feeds water directly to the roots of your plants, keeping moisture levels in the perfect range. As water is dripped below the soil’s surface, there is little chance for run off or evaporation, and the system is designed to run daily unless it rains.

Setting Up a Schedule

Here in NH, it’s recommended that watering is done between sunrise and 10 am, or 6pm and midnight, and watering is not needed if it has rained within the last 48 hours or if it’s scheduled to rain within the next 24 hours. By keeping to this schedule, no to minor adjustments should be needed if drought restrictions come into effect in your community.

Most lawns need to have about an inch of water or so a week, yours may need more or less depending on a variety of conditions. Call us at 603.707.0630 and we can work with you to help you come up with a good watering schedule based on what kind of grass and soil you have, and how long it takes your sprinkler to distribute an inch of water, so you can be sure your landscape is not over or under watered.

Controlling the Flow

While developing a schedule is crucial, life doesn’t always follow a plan, no matter how well that plan is thought out. Droughts happen, rainstorms happen, and schedules get pushed to the wayside. The best way to control any complication to your plan is to attach your irrigation system to a smart controller. A controller is as vital a part of your irrigation system as your sprinkler heads, so make sure to take the controller into consideration when choosing your system.

The controller should automatically adjust to weather conditions and cut down on any unnecessary water use. Be sure to choose a controller that connects to the Cloud, and that has an app so you can control and check up on your system by phone. And preferably one that has a forecast function, so it keeps itself aware of current weather conditions. A good controller is one that will control the different zones of your system differently, so your vegetable garden can be set up on a different schedule than your lawn and your shrubs, for example.

At Stephens Landscaping, keeping your property lush, green, and healthy is our goal. Our full-service irrigation division will manage your irrigation system from spring to fall.  This service includes starting your system in the spring, water management throughout the changing seasons, and shutting your system down at the end of the fall.  We also perform system repairs, system retrofits, and system upgrades to smart-watering technology. Call us at 603.707.0630 or reach out by email and we’ll be happy to chat with you about your ideas and specific needs.

Making the Most of Mulch

Landscape Maintenance

Mulching has been favored by gardeners and landscapers alike for many years, as mulching adds a nice finishing touch to well-landscaped grounds and protects plants, trees, and shrubbery. Since mulch can affect the soil beneath the mulch, it must be applied properly to not damage the root system of your plants. We’ll discuss what to consider when adding mulch to your property so you can make sure your gardens, yard and landscaping look their best year-round.

What is mulch?

Mulch is the name used for a substance that’s put on top of soil to provide protection or add visual interest to an area. When you are deciding which mulch to use in your landscaping, remember, the best mulch is an organic material, that is, it’s a substance that already comes from nature. Common mulches are made of bark/wood chips, and moss. Mulch comes in a variety of colors, so you can choose one that best complements your property features and landscape design.

Why use mulch?

Mulch has been used to add an aesthetic, decorative touch to landscapes for decades. Mulching around plantings, shrubs and trees adds a dimension of shading under foliage as well as contrast under brightly colored flowers. But mulch serves much more than a decorative purpose.

Mulch can help deter weed growth among your plantings by not allowing sunlight to pass down to them. It will help the soil around your plantings retain moisture, which is always beneficial to their growth, especially in dry periods. Mulch traps water and slows evaporation from the surface of the soil, so plants stay hydrated longer, reducing the need for frequent watering. It can protect your plants during periods of heavy rain, as it will absorb water and protect the roots; mulch will also help minimize soil erosion around your plantings.

Mulch can also help protect your plant’s roots during periods of extreme heat, as it acts as an insulator. The use of mulch can reduce the occurrence of heat damage to both the base of your plants and the surrounding soil. It will also help your plants resist pest and plant disease; in fact, organic mulches provide earthworms and micro-organisms with food, which is great for your plants and your plant health.

During decomposition, organic mulches add beneficial nutrients back into the soil, enriching your soil for next year.

Apply mulch correctly

Once you’ve decided on the “what” (type and color) of the mulch you want to use on your property, you’ll want to focus on the “how” of spreading the mulch. Improperly spread mulch can not only be disruptive to the overall design of your yard, it can also be damaging to a garden or landscape. Mulch that’s applied too thickly can be damaging to a plant’s root system and may stop water from making its way down to the root of the plant, or not allow the area surrounding a plant to drain correctly after watering or a rainstorm.

Start your mulch application by cleaning out the areas where you want to apply mulch. Take out the weeds, sticks, leaves, etc. that have accumulated over the winter months, and water if necessary. Then start spreading the mulch; it’s best to lay down mulch in a depth of approximately 2 inches.

If you’re putting mulch down around plants, shrubbery, and trees, etc., make sure to keep the mulch around three inches away from the plant itself, to help with air circulation around the root of the plant. However, if you’re mulching a vegetable garden, you do want to mulch right up to the stalk of the plant, to help with water retention. Water the whole area after mulching.

At Stephens Landscaping, we have a lot of experience with using many kinds of mulch, and we’d love to discuss which kinds and colors of mulch are right for your landscape and garden. Call us at 603.707.0630 or reach out by email.

Deer-Resistant Plants for the Lakes Region

Landscape Maintenance

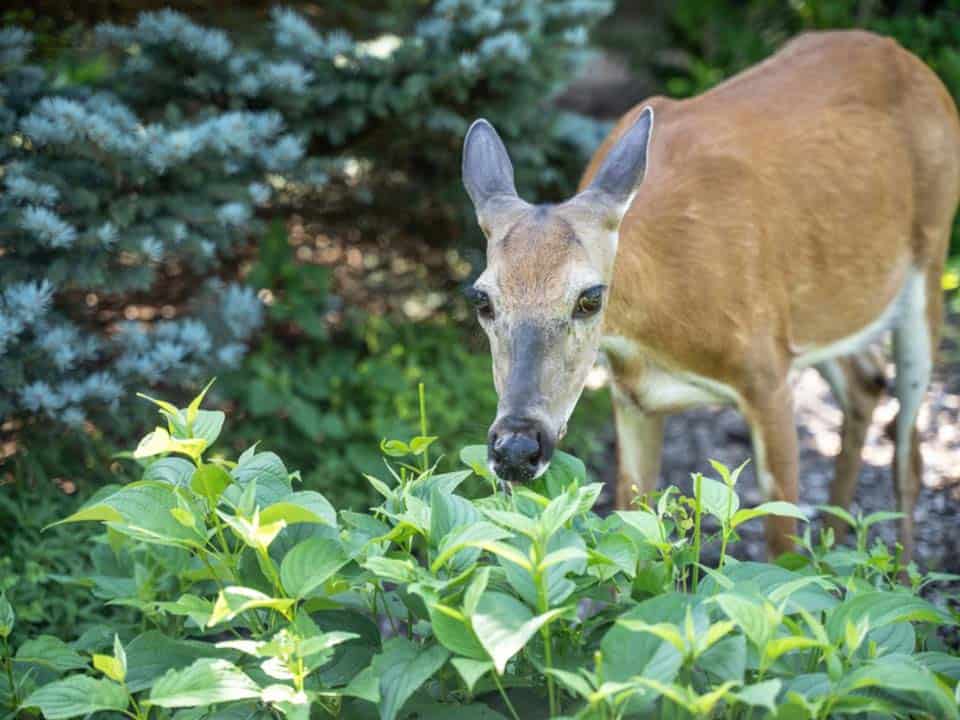
There aren’t any completely deer-proof plants. Deer eat almost anything when food is scarce, or their population is high. Like humans, deer have food preferences, even when they have many options to choose from. Depending on deer pressure, here is a selection of plants that we have found to be more and less susceptible to deer browse.

HIGHLY SUSCEPTIBLE TO DEER BROWSE

Deer love to graze on many types of groundcovers, especially the tender new growth in the spring. If you have deer on your property, we recommend avoiding the following plants as they are more prone to deer browsing and can be severely damaged:

  • Hosta
  • Arborvitae
  • Petunias
  • Euonymus
  • Some Rhododendrons
  • Evergreen Azaleas

Deer seem to prefer plants which have been fertilized over those which have not.

LESS SUSCEPTIBLE TO DEER BROWSE

Deer tend to avoid fragrant plants with strong scents or highly aromatic flowers, and plants which have leathery, fuzzy, hairy, or prickly foliage. In our experience, the following plants are rarely damaged by deer:

  • Spiraea
  • Potentilla
  • Nepeta (Catmint)
  • Achillea (Yarrow)
  • Salvia
  • Pachysandra
  • Perennial Grasses & Ferns
  • Daffodils
  • Leucothoe
  • Pieris (Andromeda)
  • Iris
  • Lambs Ear
  • Dusty Miller
  • Lavender
  • Allium (Ornamental Onion)
  • River Birch

GARDENING WITH DEER-RESISTANT PLANTS

While gardening can be challenging in areas with high deer pressure, there are a wide variety of plants with beautiful flowers and fragrant foliage that are less susceptible to deer browse also attract bees and butterflies.

Deer are especially hungry in the spring, so consider filling your spring garden with deer-resistant plants or aromatic perennial herbs. Even resistant plants are more vulnerable in the first few weeks after planting; to eliminate temptation consider a strong-smelling deer repellant or plan for additional fencing or barriers for protection.

If you’re experiencing problems with unwanted deer on your property or are looking to plan ahead before it becomes a problem, we recommend talking with our experienced staff. We’ll help you select the right plants for your landscape, plan for additional protection such as the use of fencing or recommend deer repellant products which are available at our Garden Center.

Spring Pruning Techniques & The Best Time To Prune Which Plants

Landscape Maintenance

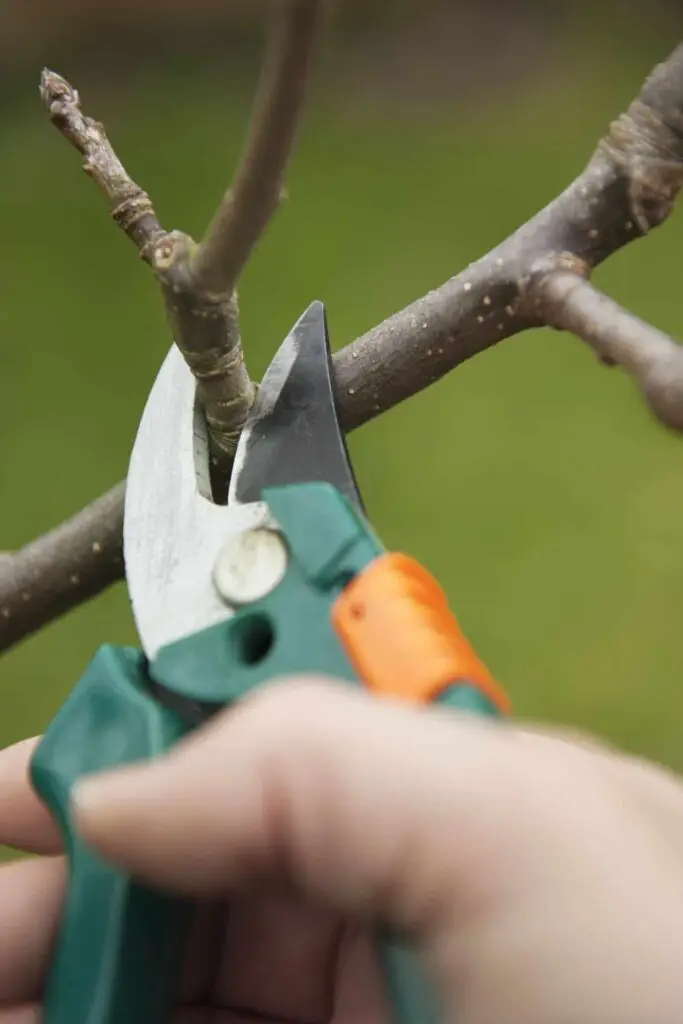
Pruning can be intimidating based on the decision of when to prune, how much to prune, and the proper types of cuts to make. Proper pruning is important and provides these important benefits.

  • To maintain plant vigor.
  • Create and preserve a good branch or plant structure
  • Increase flower or fruit production on fruit trees.
  • Improve overall health and air flow.
  • Keeping the plant size to the space in which it is planted.

People often find themselves pruning shrubs or trees more often because they have been planted in a location where mature size was not taken into account. The excess growth can lead to encroaching on other plants, screen windows, or spill into the lawn spaces and walkways.

A common mistake is pruning a plant purely by its appearance rather than looking at its natural growth factors: size, width, shape, growth rate, and determining the best course of action from there. If possible, it’s important to start pruning plants when they’re young as it is easier to maintain a well pruned tree. It’s important to cut back conservatively and knowledgeably, otherwise the plant often ends up worse off than if you just left it alone.

The first step to starting with good pruning practice is to select a high-quality plant from a reputable garden center who has been pruning it correctly from the early stages. This will create good branch structure and a good balance that will eventually establish well. Starting with healthy plants that have “good bones” makes a huge difference.

Some Things to Consider Before You Prune

It is a known fact that more pruning in young, vibrant shrubs and trees increases the amount of new growth. This means that if you prune too often, it can make the situation worse or even require more attention than if you had just left it alone. With older trees that have lost a lot of their vigor, a good heavy renovation prune often stimulates new growth of the tree and helps produce more branches, flowers, or fruit. Just like mowing grass weekly, when pruning a shrub or tree it is recommended that no more than 1/3 of the height be taken off per year to avoid stress on the tree or shrub.

Timing your pruning also has a lot to do with the species that you are working on. There is a spring and early summer prune which will help take off a lot of the new flushed growth and prohibits a lot of new shoots. You should be careful on fall pruning of some items as this can stimulate new flushes of growth that can be damaged by early frosts and cold freezes.

For flowering type shrubs and trees, it’s important to determine if the species will flower on the new buds from the current season or the previous season’s growth. Knowing this will help you decide when it’s best to prune and reduce cutting off the new potential flowers. We have found that if you prune in the dormant season, and take off growth with buds that would have developed in the spring, it will help the plant flower more and develop a stronger branch structure. This also helps reduce the time that the open wound is susceptible to disease before active growth starts.

There is definitely a benefit to pruning shrubs and trees for the right reasons. It’s always good to take off any dead, diseased, or dying material at any point. This will reduce the stress on the plant, reduce the wounded area from insect and disease damage, and allow the wound to heal correctly. If you put thought and consideration into what you are trying to accomplish and what outcomes you hope to have, this will drive how you do your pruning, when you do it (depending on species), and will also help you decide if you really have the right plant for the area.

Proper Pruning Tools

  • Loppers: used for larger branches up to 1” in diameter.
  • Pole Pruner: used for different size branches that are further up in the canopy of the tree that cannot be reached from the ground or ladder. These have a lopper-type cutting ability as well as a heavily toothed saw that is used for larger branches.
  • Hedge Shears: used to shape smaller shrubs with very fine or thin branches.
  • By-Pass Pruners: this type of pruner has the blades slide by side like a pair of common scissors.
  • Anvil Pruners: this is a sharp blade that pushes down on a flat, small metal surface on the pruner to cut the branch.
  • Chainsaw: used for larger branches that cannot be cut by a pole saw or other method.

It is very important that you sanitize your tools before you start pruning anything. A simple 10% bleach and 90% water solution is the easiest way. It is recommended that you do this between each type of plant and cut that is being made to reduce the chance of spreading a disease. Although it is not common to spread disease through pruning, there is some risk, and sanitizing your tools will reduce that risk greatly. It’s also a good idea to always start with your known healthy plants and then finish pruning any plants or shrubs in question.

When you start to prune your plants, you need to consider what the mature look of the plant is and make your pruning cuts accordingly. The type of cut and where it is made will have a big impact on how the wound heals, along with how the new branch structure will grow out and effect the health of the plant in the future. It is said that most species of shrubs and trees will respond to the cut similarly as long as it is done the right way.

Different Types of Pruning Cuts

There are several different types of cuts that can be made during the pruning process depending on what the condition of the plant is, what you are trying to accomplish, and the species of the plant as well:

  • Heading Cuts: this is when the new growing part of the branch is taken off, which then stimulates the lower buds to push out a vigorous flush of new growth. This method is often used when you want to create a dense type of growth like shaping a small shrub, hedge, or tree. If you are using this method only to keep the plant size down, you have the wrong plant for that location.
  • Pinching: this method is used by taking off only the new growth on the stem or branch, which then pushes out new growth from the buds below that to develop into branches. The more often this is done, the denser the branch structure will become as the plant grows. For example, we see this type of practice a lot in the growing of annual plants or fall mums that have 3-4 pinches in a 6 month period to shape and build out the density and fullness of the plant.
  • Thinning Cuts: these types of cuts are taking off more than the small new growth at the tip. It is cutting back down to the first or another lateral branch which then will put energy back into the growth of that lateral branch rather than pushing out new growth at the pruned location. This method is often used to help open up air flow inside the canopy of a tree, cut crossing branches out, and decrease the height.
  • Removal Cuts: this is one of the heavier cuts made which results in taking the branch right back to the main stem or trunk of a large tree. It can be utilized when trying to limb a tree up from the ground.

Branch Collar and Branch Bark Ridge

When making cuts during pruning, it is very important that each cut is done with the correct angle as trees and shrubs do not have the ability to heal “tissue”. Instead, they create a barrier of cells to reduce the damage of the wound. The cut angle is easy to establish once you are able to identify the key features on the branch. These features are the “branch collar” and “branch bark ridge”.

  • Branch Collar is the swollen area that is found right where the branch and trunk tissue connect at the start of growth.
  • Branch Bark Ridge is the area of the branch in which there is raised bark that the branch and stem meet at. This area is crucial to the health of a tree because the “woundwood” is located inside this area, which has cells that help form tissue to protect the tree from decay after cuts are made.

When you start to prune, the cut needs to be right above the branch collar and at the same angle as the branch bark ridge. If you cut below or your cuts are flat, this reduces the amount of woundwood and the trees ability to fully heal the wound, which then opens the tree up for decay and insects.

If you are worried about doing this process, you can always start out on a small shrub or tree in an inconspicuous location, take a photo of the area you are about to prune, and make the proper cut. Then, in a few months, return to that same shrub or tree and see how your pruned area has developed based upon your pruning technique. Start small until you are comfortable and confident in what you are doing. There are many books, online articles, and resources to refer to in making the right decisions on timing and techniques. And, as always, our experienced staff at Stephens Landscaping Professionals is here if you want your pruning expertly taken care of.