Elevated Fall Decorations for Your Front Porch

Garden Center

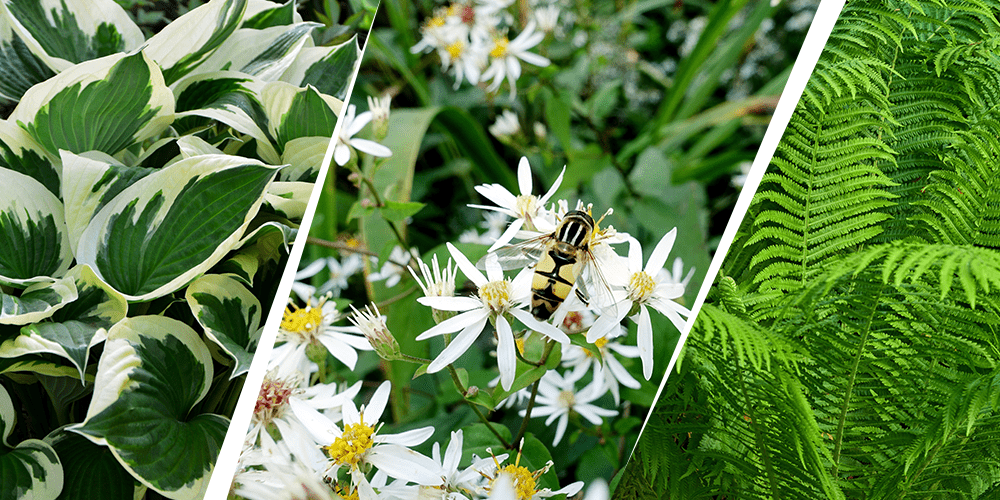
Autumn is one of the most breathtaking and beautiful seasons in New Hampshire. We can recreate a taste of that beauty right at our doorstep by decorating our front porch with a fall display. Your yard is brimming with colorful plants to use, fall annuals are blooming, and the farmer’s markets are loaded with the harvest of pumpkins and squash. All it takes is a little creativity to set up some decor that will harmonize with the season!     

Stephens Landscaping Garden Center-Moultonborough-Front Porch DIY wreath

Autumn Door Wreath 

If you’re feeling crafty, try your hand at making a fall wreath for your front door. All you’ll need is a wreath frame, wire or hot glue, and beautiful plants from around your yard. Save your evergreen boughs for Christmas, and instead, try weaving together dried grass, corn husks, burlap, grapevines, or any bendable branches from shrubs, like dogwood and willow. 

For color, tuck in fall leaves, pine cones, or fall-blooming flowers like coneflowers, asters, sunflowers, and black-eyed Susans. Add a festive ribbon as a finishing touch, and your wreath will be ready for a welcoming fall display on your front porch. 

Stephens Landscaping Garden Center-Moultonborough-pumpkin welcome mat

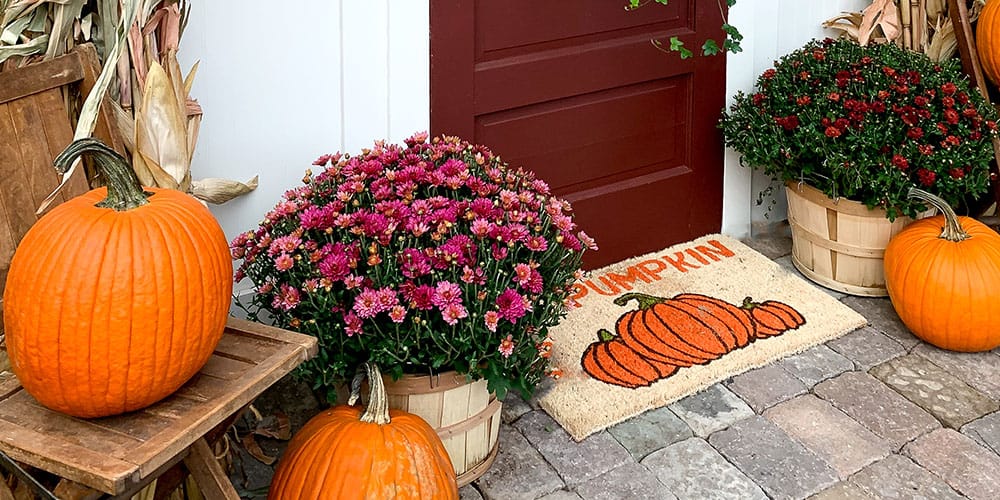
Front Porch Chrysanthemums 

You don’t need to have a pumpkin planter to take advantage of fall annuals on the porch. Chrysanthemums are one the most prized bloomers for this time of year. You can find red, yellow, and orange varieties to match the fall foliage or beautiful color contrasts of magenta and pink. To be extra festive, try dressing up your planters with burlap, ribbons, or bows of dried grass.  
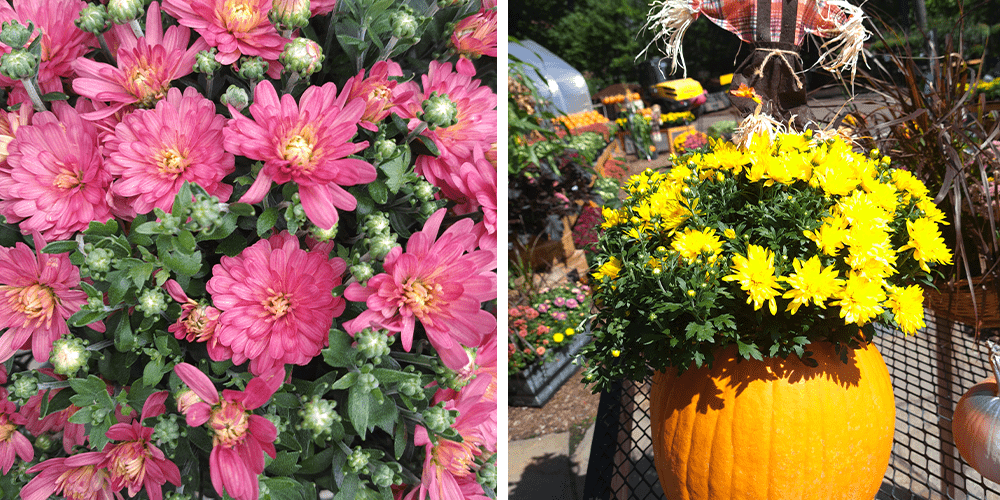
Stephens Landscaping Garden Center-Moultonborough-Front Porch Autumn Decor Mum and Pumpkins

Pumpkin Planters 

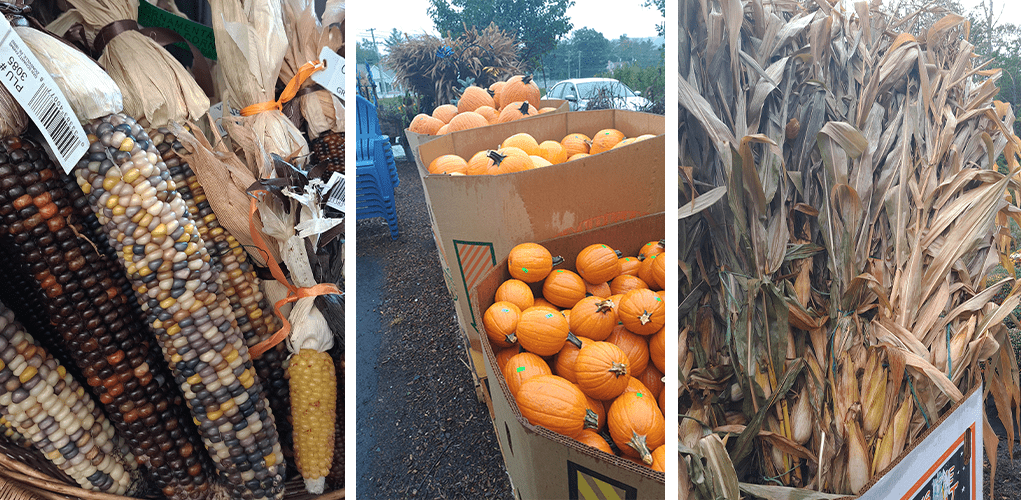
Few things say “fall decor,” like pumpkins and squash. You can make these jewels of the harvest into beautiful porch displays by turning them into planters. Simply cut an opening on the top, carve them out, and drill a hole in the bottom for drainage. 

Next, place potting soil with flowers right inside the pumpkin, or hide a small pot inside the shell for your display. Living flowers, like mums, work well, as do cut and dried flowers from the foliage around your yard. Either way, you’ll have gorgeous decor that fits with the season. 

Fall Farmhouse Porch Display 

Evoke the charm of the fall harvest by bringing a taste of the farm to your front door. Set up a straw bale, an antique lantern, and a cornucopia filled with gourds, apples, leaves, and other symbols of seasonal abundance. A pitchfork, milking pail planters, and a wheelbarrow full of pumpkins are other ideas to play with as you create your display.     
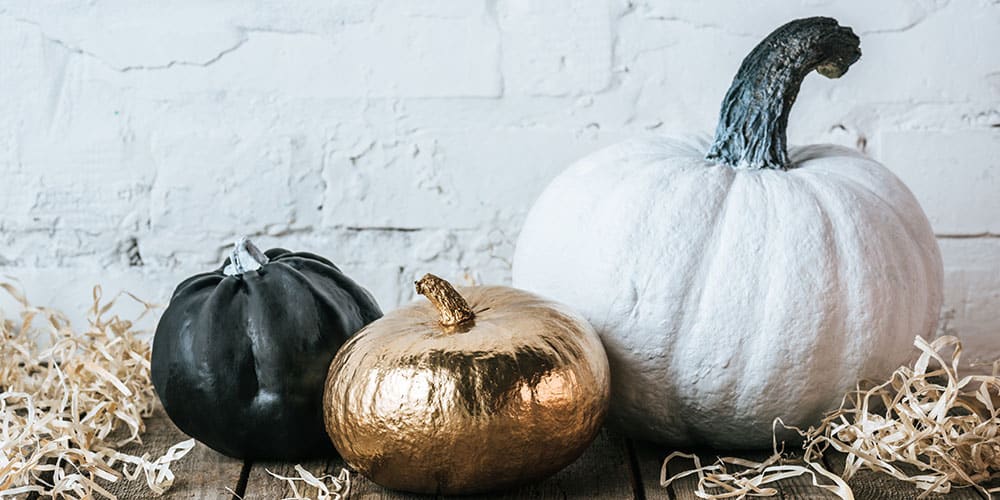
Stephens Landscaping Garden Center-Moultonborough-Front Porch painted pumpkins

Painted Pumpkins 

Pumpkins and squash alone are already works of art that can turn your porch into a festive decor display. If you want to practice your creative skills, you can also paint them with unique colors, like silver and white. The broad surface of pumpkins is also an ideal canvas for written messages, like “spooky season,” “falling in love,” or “fall greetings,” to welcome your guests to your porch. 

Pumpkin Lanterns

Fall is also a time of increased darkness, but we can use the dark hours to create beautiful nighttime displays. We’ve all heard of Jack-o-lanterns, but pumpkins also make gorgeous lanterns throughout the fall. Save the spooky face for Halloween, and instead carve out heart-warming shapes of leaves, birds, animals, or any silhouette that comes to mind. Instead of a candle, use a small light inside to illuminate your pumpkin lanterns.     

Stephens Landscaping Garden Center-Moultonborough-Front Porch Autumn Decor Pieces

These ideas for fall front porch decor in New Hampshire can stand alone or be combined to create unique displays of your own. For any supplies you might need, feel free to visit Stephens Landscaping Garden Center in Moultonborough, and don’t forget to follow us on Facebook or Instagram for updates and featured products.

Fall Care for Peonies in Moultonborough

Garden Center

Peonies are well-known, magnificent perennials with big blooms and lush leaves. They delight our senses every summer or spring with luxurious heads of ruffled petals. When fall comes around, it’s high time to plant new ones, divide mature plants, and prepare them for next spring with a bit of care—here’s how!  

How to Cut Back Peonies 

Peonies have a majestic but relatively short bloom time, averaging around two to three weeks. Deadhead the flowers after their blooms are spent to save them the energy of producing seeds, but make sure the green leaves remain until the end of the summer—they will feed your plant for the rest of the season. 

Stephens Landscaping Garden Center-Moultonborough-Fall Care for Peonies-cutting back a peony plant for fallOnce the leaves go brown in the fall, you can cut the stems back to the ground. Be careful not to cut so close as to damage the crown of the plant, as this is where new growth will arise next spring. Letting the leaves and stems stay on the plant over winter invites fungi, which can damage your peonies. 

Note: This is only applicable to herbaceous peonies, not tree peonies, which don’t need to be cut back in the fall, and rarely need pruning except to remove dead and diseased branches in the spring. 

Stephens Landscaping Garden Center-Moultonborough-Fall Care for Peonies-planting a peony shrubWhen to Plant Peonies 

Fall is the ideal time for planting new peony tubers; anytime in late September or October is fair game. The tubers should be in the ground for at least six weeks before the ground freezes. It’s possible to plant in the spring, but they generally don’t do as well in the first year as those planted in the previous fall.

Fall is also the best time for dividing and propagating a mature peony. Ideally, wait until the leaves turn brown and are dormant before digging and dividing. 

Stephens Landscaping Garden Center-Moultonborough-Fall Care for Peonies-peonies blooming in gardenHow to Make Your Peonies Comfortable

  • The Best Location: Choose a sunny, well-draining location away from the wind. Remember to choose your location wisely as they don’t like to be transplanted. Peonies do best in rich organic soil but tolerate many soil types. Anticipate a growth of two to four feet in height.
  • The Planting Process: Dig a hole about two feet wide and two feet deep, and mix in some compost or aged manure during planting. You’ll see three to five “eyes” or buds on the crown of the plant—make sure you plant these facing upwards and 2 inches below the soil surface; avoid planting them too deep.
  • Finishing Touches: Mulch your new plantings with evergreen boughs, straw, pine needles, or bark mulch to protect them over their first winter. Mulch should be removed in the spring after the risk of cold weather passes, as peonies don’t like to be smothered by mulch above their crowns. Peonies more than a year old don’t need to be mulched in the fall.   

When to Feed Peonies 

Mixing in compost or aged manure when you plant in the fall will boost their growth the following year. Generally, the best time to give them fertilizer is after they finish blooming in mid-summer! Compost or aged manure are the best foods for peonies, which you can top dress around the crown but not directly on top.

Stephens Landscaping Garden Center-Moultonborough-Fall Care for Peonies-peony support metal cageTips for Summer Care

  • Stake Early: The big flower blossoms we love are usually so heavy that the stems keel over. Staking is necessary, but it’s best not to wait until the flowers fall over. You can create a more stable and discreet support system by setting up your stakes early in the spring. Tomato cages, three-legged peony stakes, or crisscrossing wooden stakes are great options.
  • Plant Different Varieties for Longer Blooms: Peonies only bloom for a short time, but you can enjoy their blooms in your garden for longer by growing more than one variety, each with different bloom times. Flower colors come in pink, purple, red, yellow, and white. Look for early, mid-, and late-season bloomers.  

For more info on peony fall care or to pick out your next new flower, feel free to visit Stephens Landscaping Garden Center in Moultonborough, and don’t forget to follow us on Facebook or Instagram for updates!  

Azaleas vs. Rhododendrons

Garden Center · Planting

Azaleas and rhododendrons are two of the most celebrated shrubs in the gardening world. With more similarities than differences, it’s easy to confuse the two. Learning their differences can help you select the best shrub for your landscape, allow you to care for their unique needs, and deepen your appreciation for the wide variety of these beautiful plants.   

Stephens Landscaping Garden Center-Moultonborough-pink blooming rhododendronBotanical Origins

Both of these species come from the larger rhododendron genus, which explains their close similarities. In that sense, you can say that azaleas are a type of rhododendron. Look at the botanical name of azaleas, and you’ll even find the genus rhododendron. But when common gardeners refer to “rhododendrons,” they’re not talking about the whole genus but rather a specific species of shrub, which are also called rhododendrons, and are different from azaleas.   

Azaleas vs. Rhododendrons: The Main Differences 

Below are some details that can allow you to identify and distinguish these shrubs:

Stephens Landscaping Garden Center-Moultonborough-azalea vs. rhododendron blooms

  • Flower Shape: Rhododendrons usually have bell-shaped flowers, whereas azaleas have tubular or trumpet-shaped flowers. 
  • Number of Stamens: Rhododendron flowers have ten stamens, whereas azalea blossoms have five to six stamens. 
  • Flower Clusters: Rhododendrons feature clusters of flowers, whereas azalea flowers are each attached to single stems, but they appear as clusters because they’re close together.
  • Flower Color: Generally, azaleas feature a wider variety of colors, ranging from white to red, orange, yellow, cream, purple, pink, and anything in between. By contrast, rhododendrons have a more classic palette of white, pink, purple, red, and sometimes yellow.

Stephens Landscaping Garden Center-Moultonborough-azalea vs. rhododendron foliage

  • Type of Leaves: Azaleas are usually deciduous but may be evergreen, depending on the climate. In contrast, rhododendrons are mostly evergreens.
  • Leaf Shape: Azaleas usually have small, thin, oval-shaped, or pointed leaves, whereas rhododendrons have larger, thicker, leathery, paddle-shaped leaves. 
  • Blooming Time: Azaleas usually bloom in April, with some “repeat blooming” varieties having a second bloom time in the summer. Most rhododendrons bloom later in the spring, after azaleas. 

Common Features of Azaleas and Rhododendrons 

Despite their minor differences, both groups of shrubs dazzle your landscape in the spring with their profusion of colorful flowers. Both personalities exude elegance, grace, color—and lots of it! It’s rare for evergreen shrubs, like many rhododendrons (and some azaleas), to display such incredible blooms. The deciduous varieties are no less stunning.    

Stephens Landscaping Garden Center-Moultonborough-azalea vs. rhododendron purple blooming How to Grow Azaleas and Rhododendrons

With their close heritage, both types of plants share many common growing preferences, including:

  • Soil: Both azaleas and rhododendrons need acidic soil to flourish, with a pH of around 5 to 5.5. If your soil is too alkaline, you can lower the pH by adding special fertilizer for acidic-loving plants or mixing in sulfate. 
  • Light: Both types of shrubs grow in full sun or partial shade. Ideally, they’ll receive the soft rays of morning light and dappled shade or filtered sunlight in the afternoon. 
  • Moisture: Azaleas and rhododendrons thrive with evenly moist, well-draining soil. A layer of mulch helps keep the moisture in, especially for newly planted shrubs. Avoid planting in areas with poor drainage where they’ll get waterlogged. 

Stephens Landscaping Garden Center-Moultonborough-azalea vs. rhododendron shrubWhen to Plant Azaleas and Rhododendrons 

These plants are pretty flexible with planting, but we recommend planting before late autumn. Planting by mid-fall will ensure your plant has time to establish strong roots before winter and prepare to take on the chilly winter months. As long as they have time to settle in before the cold, you can plant these whenever suits you best!

Visit us at Stephens Landscaping Garden Center to see the differences between azaleas vs. rhododendrons for yourself! At the end of the day, both of these spring bloomers are cherished around the globe for their exuberant display of flowers, and you can enjoy them both right in your home landscape. Follow us on Facebook or Instagram for more!

How to Grow Coral Bells

Garden Center

Coral Bells, or Heuchera, are well-loved perennials that bring zest to the shady areas of your garden. They’re recognized by their mounded habit, long stalks of bell-shaped flowers, and amazing array of colored leaves. On top of that, they’re very hardy and easy to grow—here’s how!  

The Backstory of Coral Bells 

With such a colorful and unique appearance, it’s hard to believe coral bells are native to North America, but it’s true! In fact, they were one of the first plants to be brought to Europe from North America in the 1600s. In a guidebook, you’ll likely find them under their alternative name, alumroot. 

Coral bells naturally have colorful leaves, but careful breeding has produced a stunning selection of varieties, including lime green, variegated green, purple, pink, and shades of pink-orange coral. The tiny flowers are usually pink or white and dangle from tall spikes above the mound of leaves.   

Stephens Landscaping Garden Center- Moultonborough- How to grow coral bells-shade planted garden with coral bells plantSunlight for Coral Bells

Coral bells are most at home in part-shade. They will grow in full sun; however, the color of the leaves may fade or get scorched. You can prevent scorching by giving them extra water if they are planted in full sun. It’s best to plant them in part shade, where they’re at their happiest. 

How to Water Coral Bells 

Ideally, coral bells will have consistently moist soil. They thrive with about an inch of water per week. Mature plants can tolerate drought, but due to their shallow roots, they can only withstand so much. During hot, dry stretches, water them every other day to keep them happy. 

Stephens Landscaping Garden Center- Moultonborough- How to grow coral bells-green and brown coral bell foliage

Soil for Coral Bells 

Soil rich in organic matter is ideal for growing coral bells. Good drainage is also essential, as their crowns can easily rot when sitting in a damp, shady area. They prefer the normal range of garden soil pH, which is about 6.0-7.0.    

How to Fertilize Coral Bells

Coral bells are not heavy feeders. They do well with a half-inch of compost in the spring or a light application of a slow-release, organic fertilizer. Avoid heavy fertilizing, as it can inhibit flower growth. 

Seasonal Care

  • Spring Maintenance: For routine maintenance, cut back last year’s leaves around the mound to let the new growth come through. The new leaves will fill in quickly.

  • Summer Deadheading: The colorful leaves are the greatest appeal of coral bells. Nevertheless, the small, airy flowers are beautiful as well. They bloom from late spring to summer and continue for 2-3 weeks, sometimes repeating a second bloom cycle later in the season. To extend the bloom time, you can deadhead the spent flowers. Once the flowering has finished, cut the stalks back to promote the overall leaf growth of the plant. 

Stephens Landscaping Garden Center- Moultonborough- How to grow coral bells-planting a division of coral bells perennial plantHow to Propagate Coral Bells 

You can propagate coral bells by dividing the root clumps in the spring or fall. Sometimes small offsets will grow around the mother plant, which can be carefully divided and propagated to a new area. Remember to plant the new divisions quite shallow when replanting, with the soil covering the roots. 

Troubleshooting Coral Bells 

  • Winter Heaving: The shallow root systems of coral bells sometimes make them vulnerable to lifting out of the ground during the frost-thaw cycles of late winter. If this happens, you can transplant them into a pot until the soil thaws enough to dig them back into the garden. If it’s a recurring problem, protect them over the winter with a layer of mulch around the crown.
  • Common Pests: These hardy perennials are most often pest-free. However, fungal infections like powdery mildew or rust can occur. Potential insects that may attack them include weevils and foliar nematodes. The larvae of these pests can be spotted and removed by hand before they become a problem.  

Stephens Landscaping Garden Center- Moultonborough- How to grow coral bells-shade planted garden with hosta coral bells and fernsWhere to Plant Coral Bells? 

Their colorful foliage makes coral bells ideal for bringing life to the semi-shaded areas of the garden. They can be planted beneath shade trees, along garden borders, or in combination with other perennials, like shade-loving hostas. The varied colors make them great partners to echo blooms of other perennials, or to bring new colors to the garden in general. 

To learn more about how to grow coral bells, feel free to visit our garden center in Moultonborough, New Hampshire, and follow us on Facebook or Instagram! 

The Best Flower Combinations for Stellar Gardens

Garden Center

One plus one often equals much more than two—and that’s especially true in the garden. A full-blooming flower on its own is a sight to behold, but surrounding it with contrasting blooms is where gardening meets artistry. In a sense, gardening is all about creating stellar flower combinations that elevate one another. Here are a few to get you started!   

Stephens Landscaping Garden Center - Perennial Garden Combinations --salvia daylily and garden phlox flowersSalvia – Daylily – Garden Phlox

Salvia is the first of this trio to open its flowers. The indigo towers bloom in late spring, and if you cut them back, they continue flowering all the way until fall. They’re soon joined by the beautiful contrast of daylilies, which unfurl a barrage of yellow or orange flowers from late spring to early summer. The glowing pink petals of garden phlox join the mix by midsummer. 

These complimentary flower shapes and colors are sure to make a stellar portrait in the garden. All of them prefer full sun and well-drained soil.  

Stephens Landscaping Garden Center - Perennial Garden Combinations --catmint tickseed and blazing star flowersCatmint – Tickseed – Blazing Star 

Here’s a combination to take the spotlight in the middle of the growing season! It begins with the light blue glow of catmint, along with its soothing fragrance, in late spring. From June to September, tickseed unfurls a cloud of bright yellow flowers above the finely textured leaves. By midsummer, blazing star displays impressive wands of frizzy lavender petals.   

The combination of heights and colors brings a splendid contrast to the perennial garden during the hottest months. These plants prefer full sun to part shade and average moisture.  

Stephens Landscaping Garden Center - Perennial Garden Combinations -echinacea goldenrod and new england asterEchinacea – Goldenrod – New England Aster 

This triad of flowers brings music to the garden in late summer and fall. The fluorescent purple or white petals of echinacea start blooming in midsummer. They carry on their tune right into the fall when they’re joined by the sunset yellows of goldenrod. New England aster joins the chorus around the same time—late August or early September—with the star-like violet petals.  

These late-season bloomers provide a banquet for the senses, as well as the pollinators. They all thrive in full sun or part shade and well-draining soil. 

Stephens Landscaping Garden Center - Perennial Garden Combinations -ligularia swamp mallow and great blue lobelia flowersLigularia – Swamp Milkweed – Great Blue Lobelia 

Here’s a combination to take advantage of any wet conditions in the garden. Ligularia’s vibrant yellow or orange blooms and mound of dramatic foliage set the scene with a cheerful backdrop. Then comes the swamp milkweed with its clouds of pink petals, which butterflies adore. Meanwhile, the great blue lobelia unfurls towers of ethereal blue petals above leafy stems throughout the summer. 

This stellar combination thrives in wet meadows, moist soils, or at the edge of ponds. They’re also great candidates for a rain garden.   

Stephens Landscaping Garden Center - Perennial Garden Combinations -hosta white aster and fern plantsHosta – White Wood Aster – Fern

Here’s a team of perennials to bring beauty to the shade garden. Hostas offer lush green or variegated green leaves and subtle pink or white flowers that open sometime during the summer, depending on the variety. The white wood aster, like other asters, saves its beautiful white blooms for the fall. Meanwhile, ferns anchor the space with graceful green fronds that freshen the air throughout the growing season. 

If you were ever wondering what to do with a shady area, this is a great combination to try. Ferns like evenly moist soil, while the hosta and white wood aster are adaptable to many soil types.

Stephens Landscaping Garden Center - Perennial Garden Combinations -summer garden sunset over the flowersHow to Create Your Own Flower Combinations 

If you’re feeling creative, try experimenting with your own perennial combinations. Look for beautiful color contrasts, varied leaf textures, and differing flower shapes. Keep in mind that combining plants with similar light, soil, and moisture needs will give your garden the best opportunity to thrive. 

For more inspiration on stellar garden flower combinations, visit our garden center in Moultonborough, and follow us on Facebook or Instagram