Gardening for All Four Seasons

Landscape Design

When we think of our gardens, we think of colorful flowers blooming in the spring, growing at a prolific rate in the summer, gradually fading in the fall, and then in the winter, we nostalgically wait to see some pop of color again. But, with a little planning and perhaps some professional help, you can have a garden that showcases delightful swaths of color all year round.

Planting the Foundation

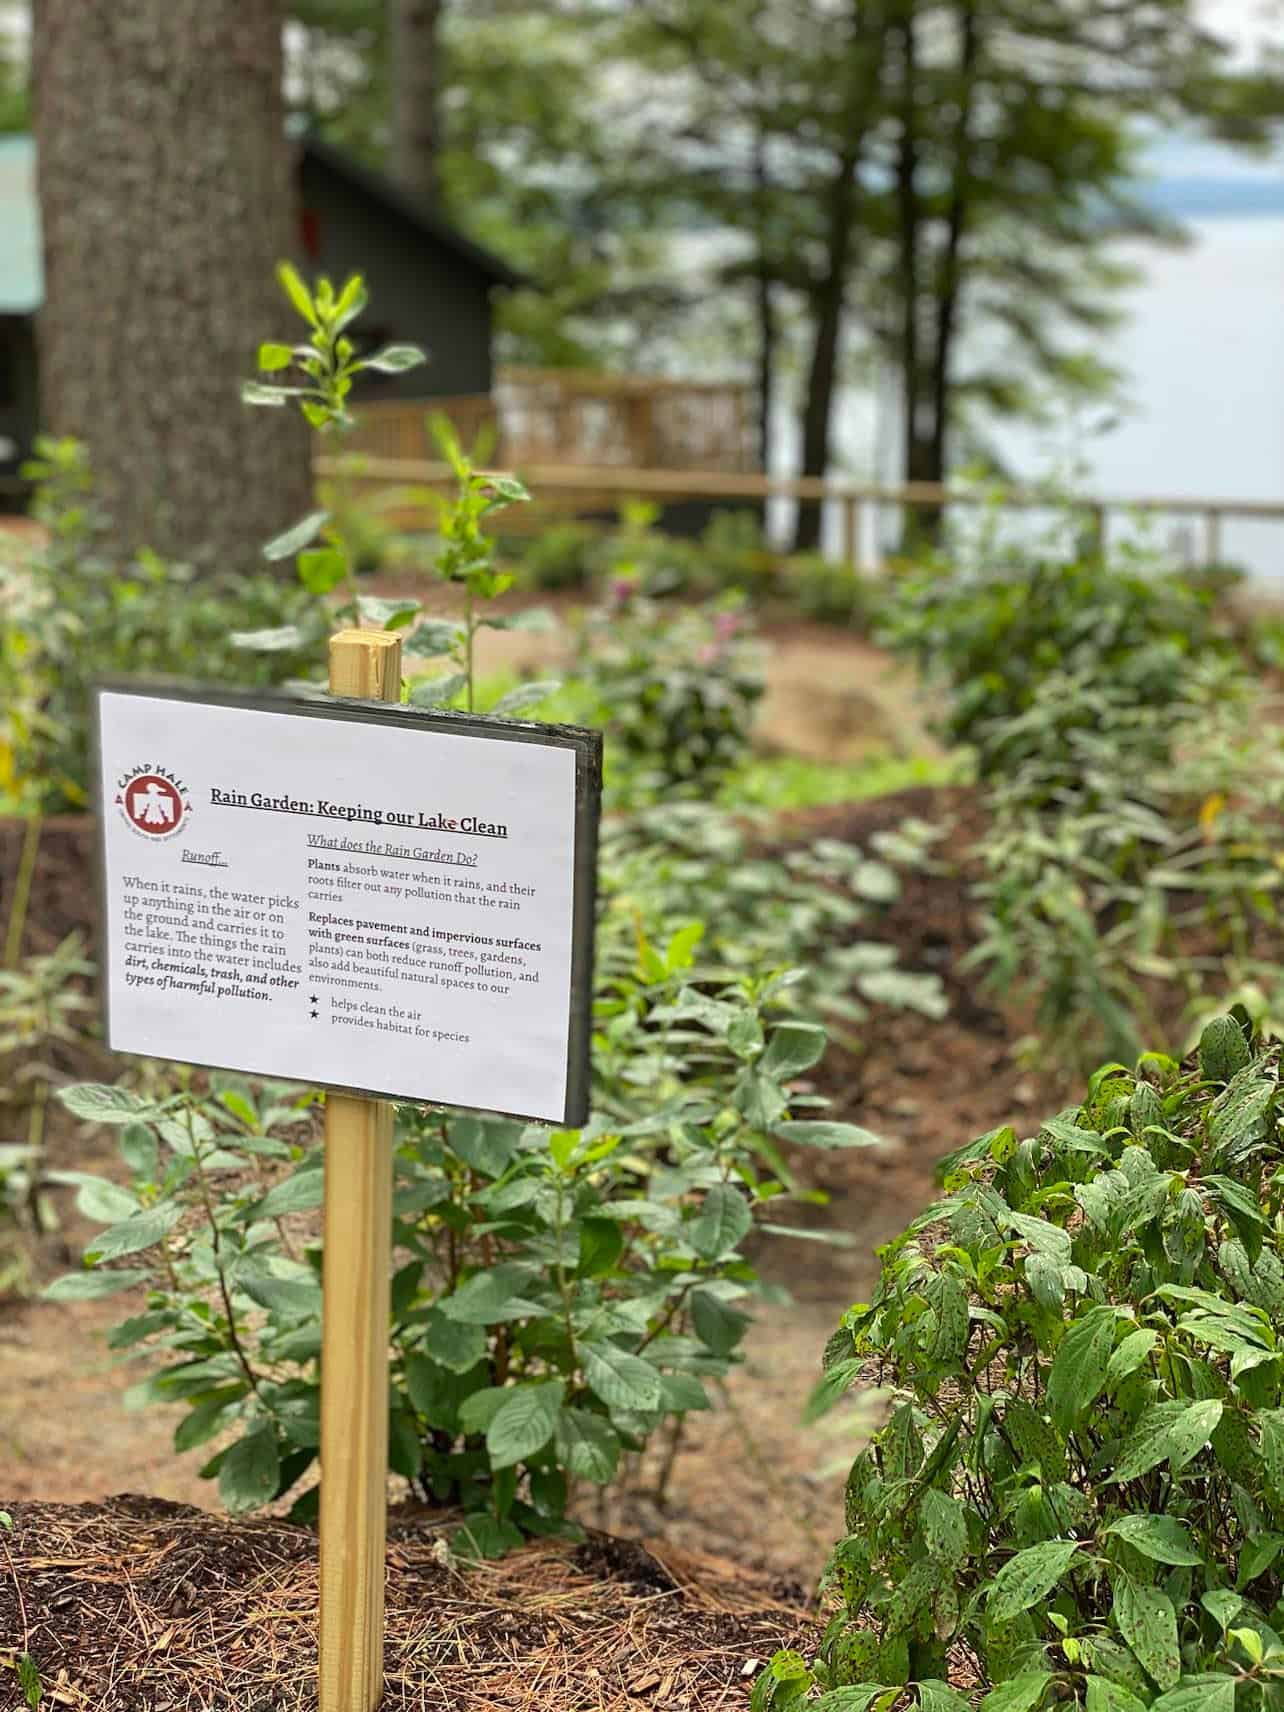
If flowers are the stars of gardens, trees and shrubs are the best supporting actors; they provide the structure necessary for the stars to shine. Trees and shrubs provide the shade necessary for your garden to thrive.

Trees like maple and red oak will provide beautiful foliage in the fall, and dogwood and the eastern redbud bloom in early spring, bringing your garden necessary color soon after winter. Evergreens do what they say they will do…they stay green all throughout the winter, reminding us that not everything is gray, brown, and white.

Shrubbery such as holly bushes will provide a nice pop of red color throughout the winter and provide perfect clippings for holiday décor. Most holly bushes need both a male and female bush planted near each other to be able to produce berries, so keep that in mind when purchasing this shrubbery; only the female will have berries.

Hellebore is a beautiful flowering shrub that is very cold tolerant and does not need to be deadheaded or pruned back when fall comes, and their flowers are some of the first to arrive in spring. During the winter months, don’t be alarmed if you see the shrubs lying flat! They are not dead; they are just trying to gather warmth from the ground. As the temperatures rise, so will they.

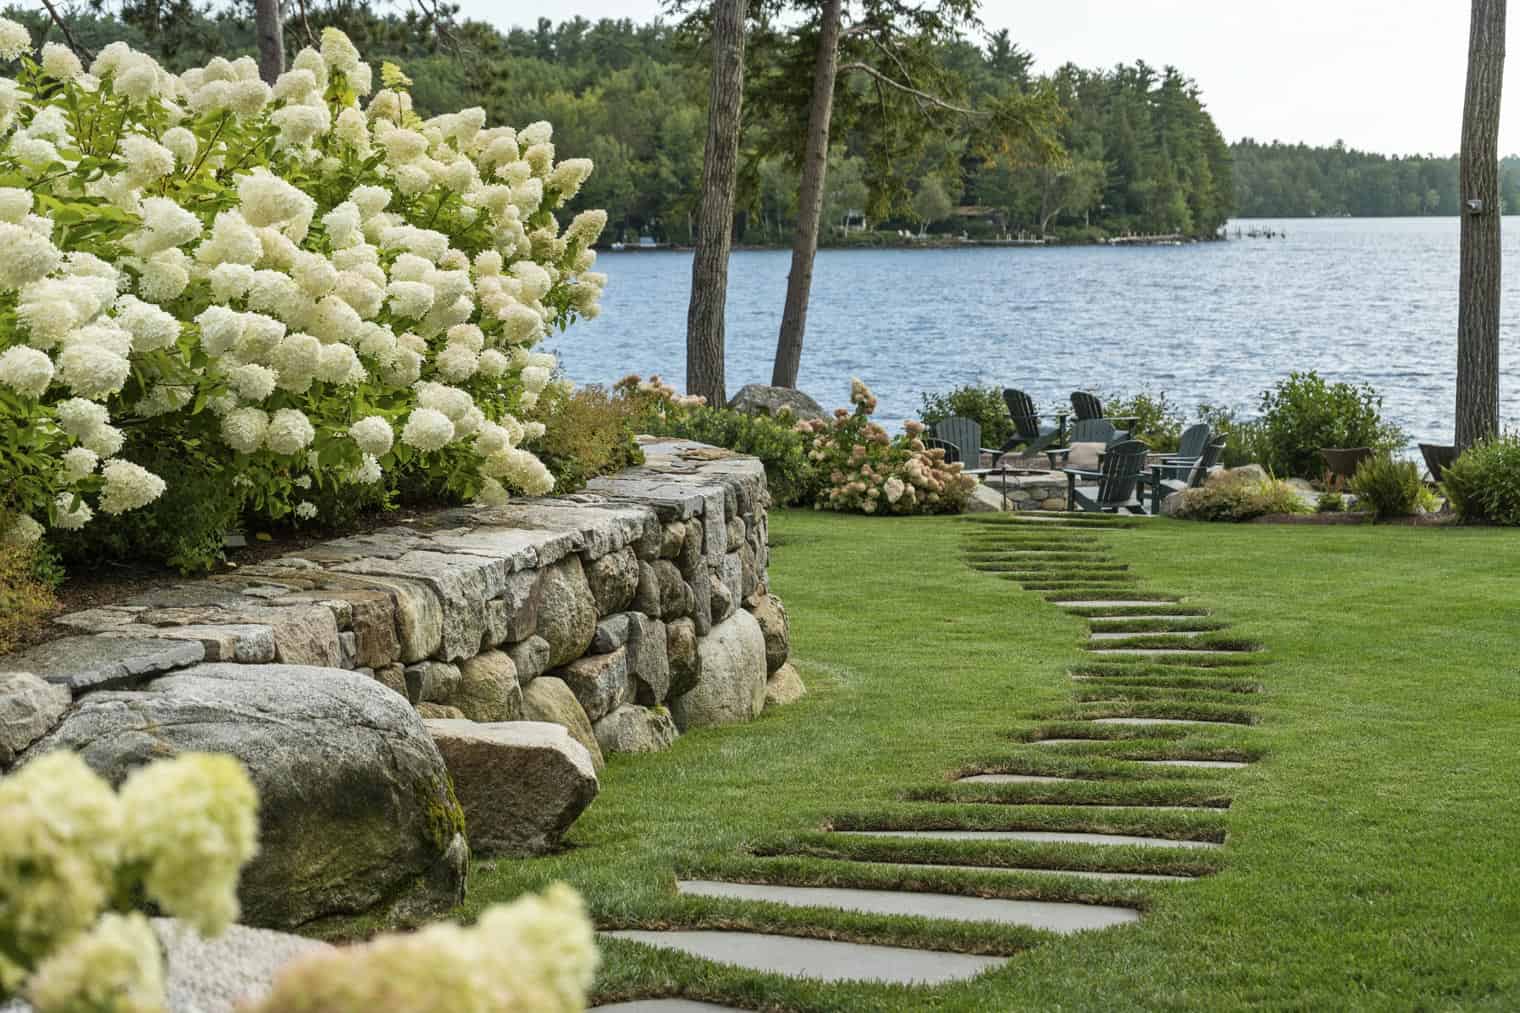
Hydrangeas, azaleas, rhododendrons, and lilacs are popular shrubs in New England, and produce an abundance of blooms throughout the spring and summer. Lilacs are especially popular in New England, as they were traditionally planted near kitchen windows or doors to help with odor control. The oldest living lilacs in North America are here in New Hampshire, at the Governor Wentworth House in Portsmouth; they are thought to have been planted in 1750!

Creating a Colorful Palette

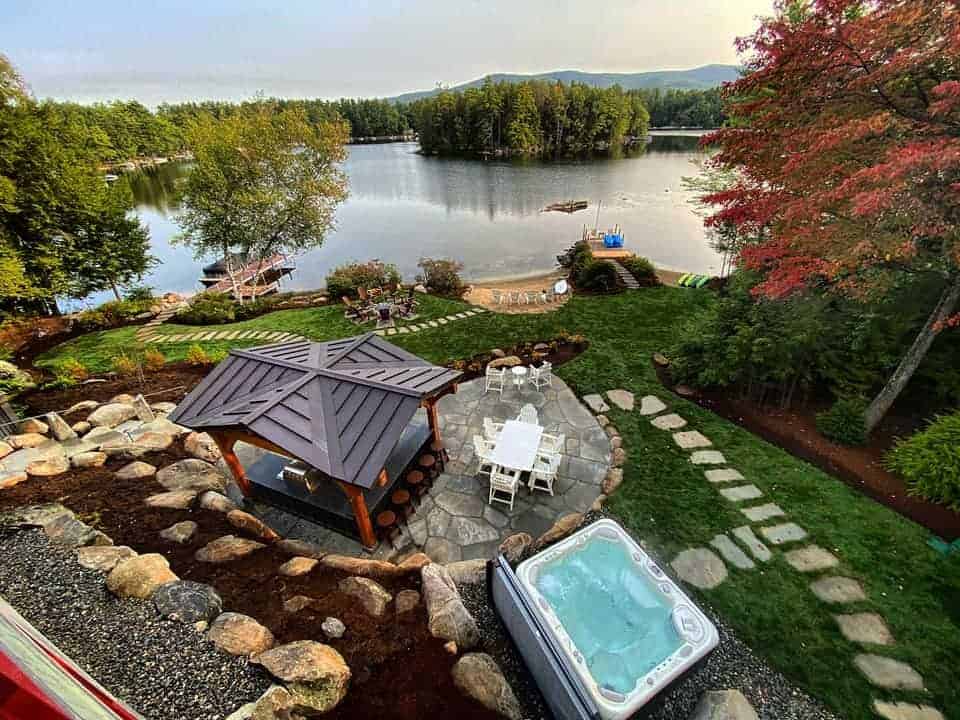
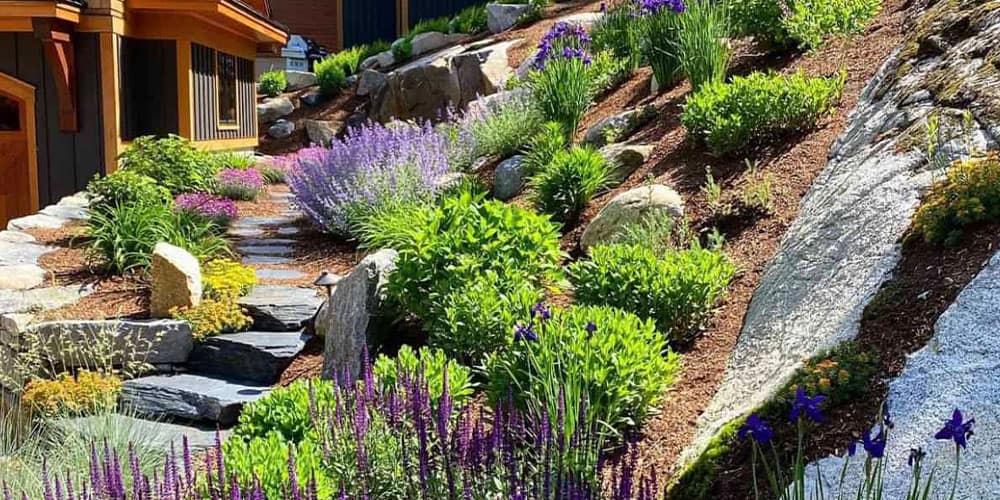
The next thing to think about in your garden plan is adding interest. Planting borders of mixed perennials are a great way to add long-lasting and stress-free color and interest to your landscaping. Plant once and forget about it, mostly, but it’s best to divide perennials every couple of years to stimulate blooming and growth. You’ll want to aim for a good mix of colors, textures, heights, bloom times, and blooming durations.

Irises, daffodils, tulips, and crocuses bloom quickly in the spring, giving us first glimpses of color. These are great for getting your garden started.

Allium will provide color and height along with visual interest in summer, as will poppies. Lavender keeps its purple color for a long time once it blooms. Sunflowers will add height and color in the summer to the fall, and zinnias are perfect for a wondrous splash of color closer to the ground. Perennials like mums and asters will provide color until frost and will come back year-after-year to provide color when the rest of the garden is dying off.

Stephens Landscaping Garden Center - everything you need to know about mulch - landscape with mulch gardenAdding Layers

Ornamental grasses are perfect for filling in between the flower layer and the tree/shrubbery layers. These colorful grasses will add depth to your design, and visual interest to your four-season garden.

Grasses to consider include:

  • White sage: These fragrant, silvery white leaves will go well in any garden and are deer and rabbit resistant.
  • Elijah blue fescue: These stunning dwarf grasses add a delightful visual interest and a great bit of color to any garden.
  • Purple fountain grass: This grass is noted for their calming movements as much as their burgundy plumage.
  • Little Bluestem: This popular border grass is noted for growing straight up, and for its beautiful bronze color in the fall.

Ferns, hostas, and other foliage are a great addition to gardens as well. Hostas come in a variety of patterns, leaf sizes, and leaf shapes. There are many varieties of ferns, and each can bring something special to your garden:

  • Ostrich Fern is big and showy and can grow up to six feet tall.
  • American Royal Fern grows well next to hostas and will grow to about five feet in a shady garden.
  • Himalayan Maidenhair Fern is a great groundcover and is evergreen.

With a little forward planning, and some carefully chosen plants, your garden can be a showcase to be proud of throughout the year.

At Stephens Landscaping, we have the knowledge and the experience to help you make the most out of your four-season garden.  Contact us to discuss your ideas or give us a call at 603.707.0630 to discuss your fall planting project, and be sure to visit our Garden Center for all of your planting and holiday decorating needs. We’ve got new plants coming in weekly, all available for delivery.

Adding Natural Stone to Outdoor Spaces

Landscape Design

Adding natural stone to your landscape is a fool-proof and low-maintenance way to easily add visual interest to your property while also increasing your property’s value. Stone can add some nice extra touches or be the element that ties your entire landscape together. Because stone comes in a variety of shapes, sizes, colors, and materials, it’s best to come up with a plan of where you want to use stone, what you want the stone to do, and the look you’d like to achieve for the area.

Do you want the stone to serve a functional purpose, like crushed gravel in a driveway or flagstones in a pathway? Or are you looking to build a retaining wall or edge your lawn with pavers? Perhaps you are looking for artwork to define a corner of your property, like a fountain or a sculpture? To get the maximum benefit from natural stone, a great plan incorporates natural stonework in a variety of uses around the whole the property, using what best fits in to the environment. In this article, we’ll give you a variety of ideas for the use of natural stone on your own property.

Useful, Functional Stonework

Natural stone has been used in gardens and landscapes for centuries. In this application, stones provide visual interest to your property while serving a functional use.

  • Many lawns and flower beds are edged with stones. This type of edging provides a crisp, clean edge for your garden and lawn, and keeps mulch or gravel in place.
  • Since it doesn’t have to be replaced year after year, stones like white and tan beach pebbles, and river and lava rocks are used in the place of mulch around trees and shrubbery.
  • Crushed gravel and brick chips can be used for driveways, walkways, and directional pathways that wind through gardens and around properties.
  • If you have an area that’s prone to water pooling, you can use natural stone to create a dry creek bed. Any area that tends to hold water during heavy rains can be made into a visually appealing area with the addition of different sized natural stone rocks and the right plants, which will redirect the flow of water.

Adding a Bit More Interest

Stonework doesn’t have to be purely functional; by varying the natural stone you add to your outdoor space, you can add some beauty and visual interest as well.

  • Walkways and pathways can be made from differently shaped and colored flagstones. Light colored flagstones will brighten up a dark or shaded area, and by matching colors that already exist on your property, you can tie everything together for a cohesive look.
  • You can build stone walls to define different areas of your yard, or build a wall around your property’s perimeter, like the boundary lines of old New England homes.
  • A large accent rock or boulder in a corner of your yard, around which you plant a great variety flowers, is a wonderful way to add both color and visual interest to a spot that you may not know just what to do with otherwise.
  • A rock garden is a great way to add a good a section rocks and plantings to your landscape where you can feature some creativity. You can match the rest of your landscaping or do something totally different depending on your aesthetic.
  • Adding a stone bench to your yard is a great way to create seating and enjoy your outdoor space, especially if you position the bench where you can savor a great view.
  • If you have a shoreline, a beautiful stone retaining wall is a great way to stop erosion, and protect your shoreline and create lawn edging.
  • With some some grade variations on your property, you can use large slabs of natural stone to create beautiful staircases that make transitions easier from one area to another.

Bring Art Outdoors

Natural stone is a great way to add lasting, enduring art to your outdoor spaces. This is where you can go as wild as you dare. You can go with something as classic as a cairn, or more modern and abstract. Some ideas include:

  • A water feature or fountain. Many of these are either made from stone such as marble, or surrounded by natural stone.
  • A different type of water feature could be a waterfall or bridge, made entirely of natural stone, surrounded by lush landscaping.
  • For a more subtle water feature, stone rain chains and bubble rocks add a touch of serenity to outdoor spaces.

Extend your Living Space

Adding natural stone to your landscaping can be a big addition as well, such as adding stone elements that are extensions of your living space. Patios and pavilions predominantly feature terra cotta or flagstone floors, as do outdoor kitchens and entertainment areas. Fireplaces and firepits are all made of stone, both for beauty and for fire safety.

By making these areas out of natural, durable, and low maintenance stone, you’re sure to get years of use and enjoyment from these areas.

We have a full design and build team with extensive knowledge and experience working with natural stone for a wide variety of applications. We’d love to help you create the right design for your landscape and lifestyle. Contact us to discuss your ideas or give us a call at 603.707.0630 to get started today!

Decks and Docks: What is Best for You?

Landscape Construction · Landscape Design

Adding a deck to your property is a great way to maximize your outdoor living space. If you live beside a body of water, you’ll probably want to a dock so you can moor your boat, jet ski, or other watercraft. Or, perhaps the deck or dock you already have is beginning to show its age and needs to be repaired or replaced. What kind of deck or dock should you build,  and which material should you choose? In this blog, we’ll run down the differences in these materials to help you make an informed choice for what’s best for you and your property.

Wood

Wood has been the chosen building material for both decks and docks for many years. People often prefer the classic look of well-maintained decks and docks. A wooden deck or dock that’s cared for has a life expectancy of about 20 years.

Things to remember if you are thinking about using wood in your build is that wood must be re-stained every couple of years and resealed every year or so. Eventually, wood will rot, warp, and accumulate some insect damage over the years. Wood is also subject to splintering as it dries, so that is a consideration if you or your kids and grandkids like to go barefoot in the summer.

You could use a hardwood instead of pressure treated lumber for your deck or dock. These woods are more resistant to rot, mold, and algae. Ipe wood, for example, is more durable and has a longer lifespan than softer woods like pine or cedar (50-75 years as opposed to 20 years).

However, these kinds of woods are more expensive and decks and docks made from these kinds of hardwoods must be cleaned and oiled regularly (ideally once a year) to keep their beautiful graining, or they will fade quickly and lose their color. Make sure to use oils that reduce slipperiness.

Composite

Composite decking materials are made up of a sustainable variety of recycled substances, usually a mix of natural and synthetic materials like wood fiber, plastics, and other additives such as fiberglass or polyethylene. Composite boards are made to look like wood, and are produced in standard timber widths and lengths. These boards are available a variety of colors and wood grain patterns.

These composite decking/dock materials are easy to maintain and do not ever need to be painted, sealed, or stained; just give them a power wash occasionally, and they will look like new. Composite boards will not splinter, rot, or be eaten by insects, and are good at withstanding stains. They are built to have UV resistance, so fading is diminished. A composite deck/dock will last about 50 years.

Composite deck materials are a bit pricier than wood, but as lumber prices have increased, the gap between the pricing of wood and composite is getting smaller.

Composite for Docks

If you are considering composite decking for your dock, you should check out composite boards made specifically for marine environments.

There are companies who manufacture composite planks especially for wet environments like docks and marinas, and whose materials can be used over and underwater without fear of damage from warping, rotting, or swelling. These boards offer virtually no water absorption and will not be damaged by insects. Boards stay cool on hot days and are slip resistant to add more safety around the water. (These boards would be great to use around a pool, too!)

These are our top materials from which to choose when building or repairing your deck or dock. Which one would work best for your property depends on your needs, installation environment, budget, and how much maintenance and upkeep would be necessary to keep your deck or dock in the best shape.

We’ve helped homeowners decide, design, and build decks and docks to make the most of their outdoor spaces for increased property value and enjoyment. We’d love to help you with what’s the right choice for your property and lifestyle. Please call us at 603.707.0630 or email us to get started.

Soaking Up Winter

Landscape Design

While winters can be rough in New England, there are ways to enjoy being outside while staying warm. One of the best ways to do this is to soak and relax in a hot tub or spa.

Installing a hot tub or spa is a great way to get more use out of your outdoor space, and with a little bit of planning, it can add both year-round usefulness and a beautiful point of interest into your landscape. Soaking in a hot tub or spa is a great way to relieve stress and anxiety, as well as entertain guests and have enjoyable and memorable family time.

What’s the Difference?

While in the United States, we tend to use the terms “Spa” and “Hot Tub” interchangeably, they actually are different.

  • Spas are usually built-in structures that provide some type of water therapy treatment. Modern spas have molded seating and jets. Around the world, heated pools have been used as spas for generations.
  • Hot tubs are used mostly for fun and relaxation. They also have jets, bubblers, and their own heating and controls. They may have other extra features as well. Hot tubs are usually portable and can be placed on decks and in back yards.

Where Does it Go?

Adding a hot tub or spa to your property does require some planning. They can be built directly into a landscape or installed above ground, but either way you’ll likely want to position in a way that allows for privacy. You should consider placing it where you’ll also have a great view. The view could be out over your property, across a water feature, or offering a clear view of the open sky. Since you’ll also be using the hot tub or spa during the winter, place it where it’s out of the wind. You can locate your spa or hot tub under a pergola, on its own patio near an entry door, or incorporate into part of a deck.

Above ground hot tub and spa options are popular and more budget-friendly than built ins, although they can be designed in a way that makes them feel built it and incorporated into an outdoor space.

If you are thinking of putting your hot tub or spa directly on your deck, you’ll need to consider the weight of the unit, as well as the added water; your deck may need to be reinforced. One option you may consider is to cut your deck and recess the tub, so the top is level with the deck’s surface. This will give you a built-in look, and if you ever remove the tub, you just have to replace the deck boards.

There are various different sizes, shapes, and design options to best fit with your surrounding landscape, making it most functional and inviting within the outdoor space.

The hot tub or spa will need to be close to your house because you’ll want a short walking distance back to warmth when the weather is cold. It can also be surrounded with electric heat so that accessing it during the winter months becomes easier and more comfortable.

Your tub will need to be near a water source, for easy filling as well as near an electrical outlet for a source of power. You need to be able to drain the tub for regular cleaning as well, so make sure to consider where the drained water will go.

Fit a Tub to Your Space and Lifestyle

Hot tubs and spas come in a variety of shapes, like triangular to fit into corners, rectangular or oblong for large spaces, and round for smaller spaces. Hot tubs and spas can fit one or two people, or as many as six or eight; it all depends on your plans and the space you have available.

They can be customized to enhance the design of your outdoor space, or your desired experience. Since the interiors are molded, there is a variety of color options from which to choose: Whites and silvers invoke a feeling of tranquility; tans and beiges will give you a sandy, beachy feeling; and blues and turquoises will remind you of Caribbean waters.

LED lights can create a mood and are changeable, and audio speakers can add to the overall ambiance.

Adding a hot tub or spa will add another way to enjoy your outdoor spaces, and spend more time outside in the winter. We’ve helped many homeowners add both built-in spas and above ground hot tubs to their properties, and we’d love to help you add one to your own landscape. Please call us at 603.707.0630 or reach out over email to get started.

Rain is Here to Stay

Landscape Design

Fall and winter in New England produce a lot of rain and snow. All that water will make its way down our roofs, through our gutters and drainpipes, across our lawns and driveways, out to the street, into our municipal water supplies, and out into streams, lakes, and oceans. With that water unfortunately comes pollution, however unintended.

As homeowners, is there anything we can do to mitigate the damage unclean stormwater can do to our local environment? As a matter of fact, there’s an easy and beautiful way to both clean the water and add beauty to your landscaping—install a rain garden!

Rain gardens can be a lovely and cost-effective way of “going with the flow”, pardon the pun. A rain garden can add a focal point while also serving to reduce and clean stormwater runoff from your property and possibly alleviating possible future water problems, like water in your basement, if installed correctly.

What is a Rain Garden?

A rain garden is a dip or indent in the ground that where plants are sown; this garden area is specifically designed to collect, treat, and filter stormwater runoff. Because these gardens are sunk lower than the lawn, the dirty runoff water collects there instead of running directly into the street, and is absorbed slowly into the dirt, and/or filtered by your plants.

Where Should I Put My Garden?

A rain garden should be at least ten feet away from your house, to keep it away from your house’s foundation, and at least fifty feet away from any septic system or well. If you are unsure about the quality of your soil, a good test is to dig a hole about twelve inches deep and pour water into it; if the water disappears within twenty-four hours, the soil is the perfect quality to host a rain garden.

Rain Garden Planting Areas & Plant Suggestions

When considering plants for your rain garden, remember you’ll have three areas to consider:

  • The edge: This is the top of the rain garden, where there is a mound of dirt. This is the highest point. You’ll need to select plants that prefer drier conditions here. Some plant ideas include:
    • White Turtlehead: They prefer dry soil and pollinators love them
    • Hairy Beardtongue: These delicate blooms attract hummingbirds and butterflies
    • Butterfly Milkweed: These tiny and lovely orange flowers are long blooming
  • The slope: As its name implies, this is the part that goes downward from the top of the edge to the bottom, and out from the middle to the edge. Choose plants that can handle both moisture and dry conditions.
    • Wild Bergamot: This striking flower adds color and attracts pollinators
    • Bottlebrush Grass: This wispy tall grass is perfect for providing texture and visual interest
    • Blue False Indigo: This perennial bush will add deep blue flowers to your garden
  • The base: The bottom is the most wet part of the rain garden, and plants here need to be able to survive the wettest conditions.
    • Astilbe: Choose pink, red, purple, or white moisture-loving perennials
    • Swamp Rose Mallow: Large, showy blooms make a great centerpiece for your garden
    • Winterberry: The bright red berries will add welcome color to your garden throughout the winter months

For more helpful information on rain gardens, we recommend clicking here!


One Last Consideration

While rain gardens are relatively easy to install, an improperly installed one can cause problems with drainage—the thing they were designed to help alleviate. We’ve helped many homeowners add rain gardens to their properties, and we’d love to help you add this functional beauty spot to your own. Please call us at 603.707.0630 or email us to get started.