Rain is Here to Stay

Landscape Design

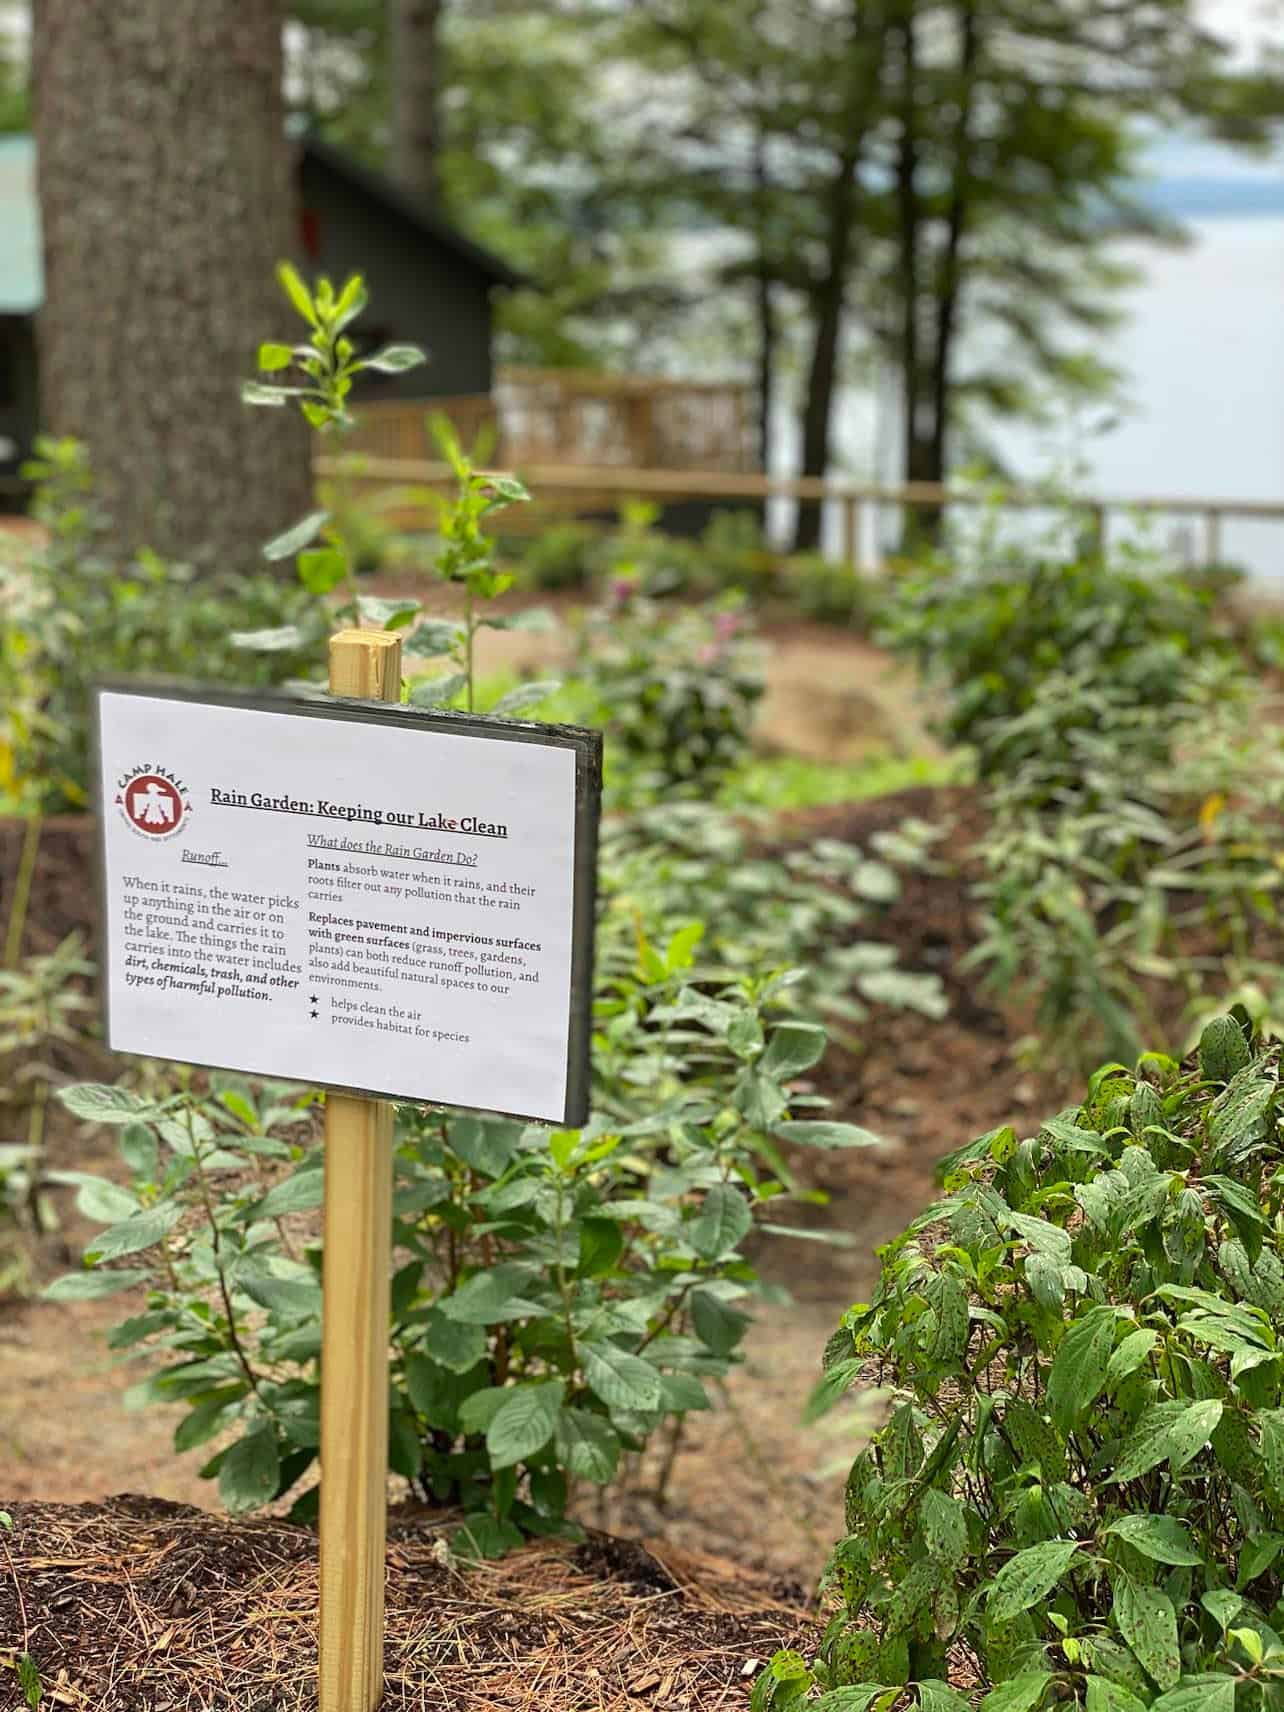
Fall and winter in New England produce a lot of rain and snow. All that water will make its way down our roofs, through our gutters and drainpipes, across our lawns and driveways, out to the street, into our municipal water supplies, and out into streams, lakes, and oceans. With that water unfortunately comes pollution, however unintended.

As homeowners, is there anything we can do to mitigate the damage unclean stormwater can do to our local environment? As a matter of fact, there’s an easy and beautiful way to both clean the water and add beauty to your landscaping—install a rain garden!

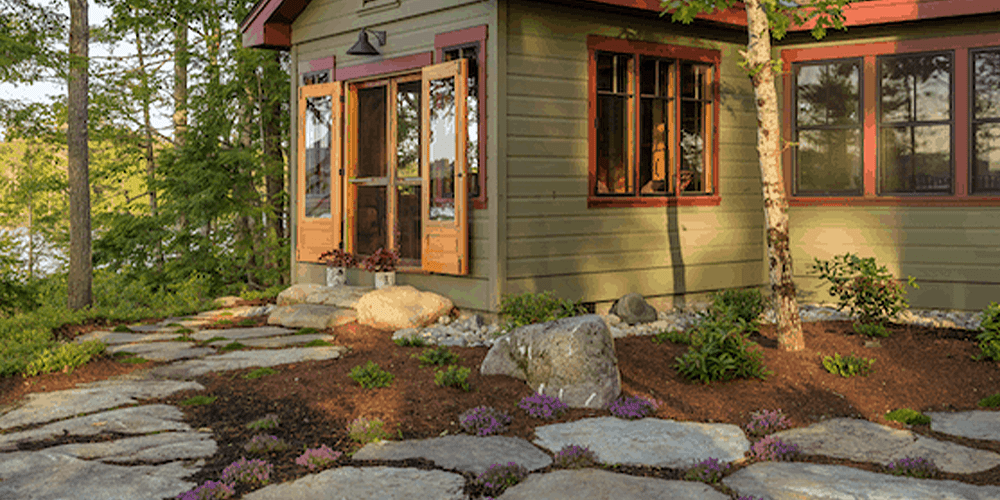
Rain gardens can be a lovely and cost-effective way of “going with the flow”, pardon the pun. A rain garden can add a focal point while also serving to reduce and clean stormwater runoff from your property and possibly alleviating possible future water problems, like water in your basement, if installed correctly.

What is a Rain Garden?

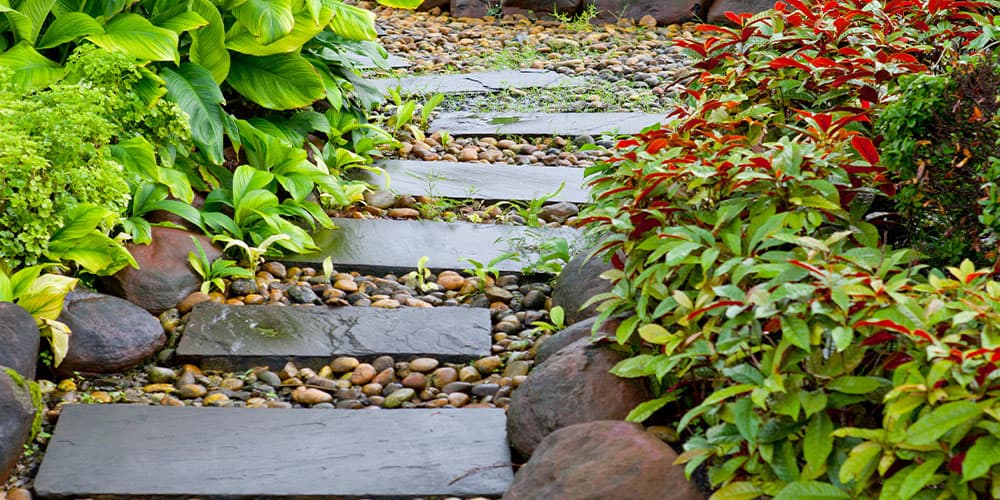
A rain garden is a dip or indent in the ground that where plants are sown; this garden area is specifically designed to collect, treat, and filter stormwater runoff. Because these gardens are sunk lower than the lawn, the dirty runoff water collects there instead of running directly into the street, and is absorbed slowly into the dirt, and/or filtered by your plants.

Where Should I Put My Garden?

A rain garden should be at least ten feet away from your house, to keep it away from your house’s foundation, and at least fifty feet away from any septic system or well. If you are unsure about the quality of your soil, a good test is to dig a hole about twelve inches deep and pour water into it; if the water disappears within twenty-four hours, the soil is the perfect quality to host a rain garden.

Rain Garden Planting Areas & Plant Suggestions

When considering plants for your rain garden, remember you’ll have three areas to consider:

  • The edge: This is the top of the rain garden, where there is a mound of dirt. This is the highest point. You’ll need to select plants that prefer drier conditions here. Some plant ideas include:
    • White Turtlehead: They prefer dry soil and pollinators love them
    • Hairy Beardtongue: These delicate blooms attract hummingbirds and butterflies
    • Butterfly Milkweed: These tiny and lovely orange flowers are long blooming
  • The slope: As its name implies, this is the part that goes downward from the top of the edge to the bottom, and out from the middle to the edge. Choose plants that can handle both moisture and dry conditions.
    • Wild Bergamot: This striking flower adds color and attracts pollinators
    • Bottlebrush Grass: This wispy tall grass is perfect for providing texture and visual interest
    • Blue False Indigo: This perennial bush will add deep blue flowers to your garden
  • The base: The bottom is the most wet part of the rain garden, and plants here need to be able to survive the wettest conditions.
    • Astilbe: Choose pink, red, purple, or white moisture-loving perennials
    • Swamp Rose Mallow: Large, showy blooms make a great centerpiece for your garden
    • Winterberry: The bright red berries will add welcome color to your garden throughout the winter months

For more helpful information on rain gardens, we recommend clicking here!


One Last Consideration

While rain gardens are relatively easy to install, an improperly installed one can cause problems with drainage—the thing they were designed to help alleviate. We’ve helped many homeowners add rain gardens to their properties, and we’d love to help you add this functional beauty spot to your own. Please call us at 603.707.0630 or email us to get started.

Fencing Yourself In

Landscape Design

In his poem, “Mending Wall”, Robert Frost pondered the notion that “Good fences make good neighbors”. While the poet seemed to waver on the need for the fence, his neighbor steadfastly supported the need to upkeep the traditional wall between properties, to keep things friendly between them. We tend to agree with the neighbor; a fence can act as a good, clear line of distinction that can clear up any confusion, stop disagreements before they happen, and improve the appearance of most properties.

Throughout time, homeowners have chosen to surround their property with some sort of fence. Some fences were built for privacy, some for security, and some for purely aesthetic reasons; there are as many reasons to surround your property as there are designs and fencing materials from which to choose.

The Whys of a Fence

When you consider installing a fence around your entire property, or just a segment of it, you first must consider what the main purpose of the fence will be. Will this be a privacy fence, to block the view of your property from neighbors or passersby, or do you not want to see the neighbors or the roadway by your house? Do you want to add a level of security to your entire property? Maybe you just want to fence off a segment of your property to designate a certain space, secure a pool or keep a child or pet safe. Or perhaps you have wildlife in the area you’d like to deter from your entertainment spaces, landscaping, or gardens. Will your fence be mostly decorative, a way to finish the overall appearance of your house and yard?

Of course, you can have a fence that does all the above: a decorative fence that gives you both privacy and security. You can have a decorative fence in your front yard for maximum curb appeal, and a fence that offers more security and privacy in your backyard.

Once you decide on what you want your fence to do for you, your next step will be to choose what you what your fence to look like, and that includes what materials the fence will be made of.

Fencing Materials

There are so many options from which to choose when thinking about fencing for your property. We’ll highlight some great options for you to consider:

  • Wood: Wood has been the traditional choice of fencing for generations. The style of fence and decorative choices are unmatched, as are choices of woods available. Some woods work better in different climates; here in New England, cedar is the most popular choice. You can mix and match what kinds of wooden fences would best with your property. Front yards can have picket fences, and while back or side yards can have a slat-style fence for more privacy, for example. Wood fences will need to be kept on a regular maintenance schedule to prevent rot, pests, and warping.
  • Vinyl: This fencing looks great and is a good choice for both security and privacy. It can be used for both the front, back, and side yards. It comes in a variety of styles and colors, and gates can be added wherever needed. Vinyl fencing is low maintenance and long lasting.
  • Masonry: This type of fencing has literally stood the test of time. Drive anywhere in New England, and you will see stone walls, even in forests where properties once stood. Masonry walls can be built from brick, stucco, stone, and concrete. They will boost curb appeal, and can create private, secure yards.
  • Composite: Fences are made from panels that are a mix of wood, resin, and plastic. They provide security and privacy when used as tall panels, and a decorative touch when used in shorter panels. These panels come in a variety of colors and can look either like wood panels or natural stone. They are low maintenance and are not vulnerable to rot or pests.
  • Wrought Iron: Mostly used in front yards, these fences are highly decorative, and add a distinctive touch to your property. They are heavy, durable, and add security; they will not be pushed over easily and can withstand most weather. They are customizable and can match your landscaping. However, they are prone to rusting.
  • Aluminum: These fences come in a variety of styles and colors. They add security, but not much in the way of privacy. They will not rust, and do not require much maintenance, and are a popular choice for pool/kid/playground areas.

What Fence is Best

Only you can decide what fence or combination of fences is best for you and your property. Ideally, the fence you choose will add to the curb appeal of your property, provide safety for your family, including your pets, and give you a sense of safety and privacy. The fence will allow you to enjoy your home and surrounding landscape more fully, without you even giving it a second thought.

We’ve helped many homeowners design fence plans to add to their properties, and we’d love to help you come up with a plan of your own. Please call us at 603.707.0630 or email us to get started.

Everything You Need to Know About Mulch

Garden Center · Landscape Design

Mulch is arguably an essential part of the garden. It adds beauty, reduces our workload, and benefits the soil in many ways. There are so many types of mulch available; how do you choose the best one? Here’s a breakdown of wood and rock mulch and the advantages and trade-offs of each kind!  

Stephens Landscaping Garden Center - everything you need to know about mulch -bean bag toss game with mulch playing areaThe Benefits of Wood Mulch 

Wood mulch usually comes in two forms: bark mulch and wood chips. Both are by-products of the lumber and paper industries, offering many benefits to the home garden. 

  • Moisture: they hold moisture in the soil, reducing the need for water. 
  • Protection: they protect the soil from erosion, wind, rain, and UV rays. Plus, they protect plants from extremes of heat and cold and the thaw-freeze cycle of early spring.
  • Reduce Weeding: mulch significantly reduces your weeding by preventing weeds from accessing the soil. 
  • Improve Soil: as the mulches break down, they furnish the soil with decaying organic matter and nutrients, which benefits the whole garden ecosystem. 

Stephens Landscaping Garden Center - everything you need to know about mulch -wood mulch in gardenBark Mulch vs. Wood Chips 

Both share all of the advantages mentioned above and differ mainly in aesthetics. You’ll find a wide selection of sizes and colors among both bark mulch and wood chips. The choice is mainly a personal preference about what you find beautiful and how your mulch best fits into the overall look of your landscape. 

A small consideration is that large, chunky mulch generally takes longer than small ones to break down and tends to shift around more in the garden during rainfall. Mulch from certain types of trees, like cedar, also lasts longer since the wood naturally resists decay.     

Stephens Landscaping Garden Center - everything you need to know about mulch -mulch pathway of rocksThe Benefits of Rock Mulch 

Rocks are another way to enhance the beauty of your garden, protect the soil, and reduce the workload of weeding. Rocks don’t break down as quickly as wood mulch, meaning you don’t have to replace them as often. If they become dirty, you can hose them off, and if leaves fall on them, it’s easy to blow any debris from the surface. 

A trade-off of their durability is that they don’t add nutrients to the soil. They can also be annoying to move if you want to access the soil for new plantings, etc. During the hot summer days, rocks also capture the heat, making them ideal for cactus gardens, rock gardens, or plants that benefit from warm and dry soil.

Stephens Landscaping Garden Center - everything you need to know about mulch -rock mulch in gardenTypes of Rock Mulch 

  • River Rock: these are smooth, naturally weathered stones in uniform gray, white, black, or a mix of colors. They come in different sizes. 
  • Crushed Stone: this mulch is made by crushing larger rocks. As a result, they have a rugged texture. They come in a variety of sizes and colors. 
  • Gravel and Pebble: these are the smallest type of rock mulch. They lend a particular zen look to a garden and are easier to shift around if necessary. They can be smooth like river rock or rugged like crushed stone.  

Stephens Landscaping Garden Center - Everything You Need to Know About Mulch-assorted bulk mulchWhat Is the Best Type of Mulch?     

All mulch has the benefits of enhancing the beauty of your garden, reducing weeds, and protecting soil from the elements. Beyond that, wood mulch has the extra benefit of bringing nutrients to the soil, whereas rock mulch has the advantage of being durable. There’s really no “best” type of mulch. The choice is yours, depending on your tastes and application in the garden

Straw, grass clippings, and shredded leaves bring many practical benefits to the garden as well. They hold in moisture, suppress weeds, protect the soil surface, and add nutrients to the garden. However, these products don’t bring the same aesthetic benefit. They’re best in vegetable gardens or to add a layer of nutrients to a bed before winter. 

Stephens Landscaping Garden Center - everything you need to know about mulch -strawberries in straw mulchHow to Install Mulch 

Mulch is pretty straightforward to install, provided that you follow some basic guidelines. Ideally, you should have 2–3 inches of mulch evenly spread throughout your garden bed—don’t make piles around the base of your plants, as this can harbor pests! Ensure you don’t bury your plants or go above the crown of the plant—it will cause the plant to generate roots too high and girdle the plant. Make sure you leave your perennials uncovered so they can come back next year, and you’re all set! 

When it’s time to add more mulch, take a look at the condition of your existing mulch before you add more; old mulch can become compacted over time, or it might not break down the way you anticipated. If your mulch isn’t breaking down, adding more will thicken the layer of mulch beyond the recommended 3-inch maximum, which won’t help your garden! In this case, it’s best to clear out the previous layers before adding fresh mulch.

To find the best type of mulch for your garden, visit our garden center in Moultonborough, where you can peruse our bulk products, including spruce and hemlock, and our wide selection of bagged mulch, including cedar. We also have a handy bulk material calculator on our website to tackle the math for your project! Don’t forget to follow us on Facebook or Instagram for the latest sales and updates!


Love for Outdoor Kitchens

Landscape Design

Hot weather has come to New England, and we, of course, want to spend as much time as possible outdoors. And we certainly don’t want to heat up our kitchens and our houses while we cook. A great way to remain part of the summer fun and help beat the summer heat is to install an outdoor kitchen.

Outdoor kitchens have progressed beyond having a BBQ grill and mini fridge tucked away in the corner of the yard; many standard kitchen appliances are available in models that can be installed outdoors, so you can customize and design a kitchen that will truly fit your family’s needs and your home’s space and décor. Adding a beautiful and well-equipped kitchen greatly increases a property’s value; some homes have seen a return on investment of 100%-200%.

Create a Plan

Once you’ve decided an outdoor kitchen is right for you, you need to start by figuring out what you primarily want to do in this kitchen. It’s easy to get carried away while dreaming and designing, and as with every renovation, the costs can add up quickly.

Think about how your family eats, and how much you entertain. Will you need a brick pizza oven, or will a steel one do? Or do you need a pizza oven at all? Will you need taps in your wet bar, or will a built-in ice chest for chilling beverages suffice? A large grill is great, but will you need a roasting spit? Do you need a small grill or fridge, or larger ones?

There are so many appliance choices available, so taking time to think about how you use your outdoor space is really the best first step. You can fill your shopping list with “must haves” from there.

Choose a location

Think of an outdoor kitchen as an extension of your indoor kitchen. It should be located close to your indoor kitchen, if possible, to make the inevitable trips indoors to grab ingredients, pots and pans, etc., easier on the chef. The kitchen should be designed to keep the chef part of the outdoor activities, so as you’re choosing your location, allow space for seating in and around the kitchen area itself.

Consider how this kitchen will fit into your décor. Ideally, you’ll want this kitchen to be built with any stonework that already exists around your home, so you can match or complement the patio tiles or wall masonry. Will you be able to extend your roofline to cover this kitchen, or would you prefer this kitchen to be under an awning or located in a pergola or separate structure? The kitchen’s location would be best situated in a spot that’s at least partially shaded and away from the wind, to make it a comfortable spot for cooking, eating, and entertaining.

Kit it Out

Once you’ve thought about what you want to do with the space you’ve chosen, how your family eats, and how you want to entertain, now, it’s time to go shopping. There are so many choices available for outdoor kitchens when it comes to appliances and fixtures. Here are some quick “shopping” lists to help you consider:

Cooking

  • BBQ Grill
  • Pizza Oven
  • Roasting Spit
  • Smoker
  • Warming Drawers
  • Gas Side Burners
  • Gas Griddles
  • Hood Vent
  • Proper venting for Gas Appliances

Cooling

  • Refrigerator
  • Ice Drawers or Bins
  • Wine Chillers/Fridges

Wet Bar/Beverage Center

  • Sink
  • Blender
  • Kegerators
  • Taps

Standard Kitchen Necessities

  • Countertops/Prep surfaces
  • Sink
  • Dishwasher
  • Storage Cabinets, Drawers and Shelves
  • Trash/Recycling
  • Pantry Storage
  • Compost Bins

Entertainment & Comfort

Material Considerations

Choosing the materials for your outdoor kitchen build is like designing your indoor kitchen, but with one extra consideration: this kitchen must withstand the elements across all four of New England’s seasons. During the hot summer months, you must be able to touch surfaces without getting burned, and surfaces must be able to withstand the cold, snow, and sometimes abrupt changes in temperature we experience throughout the year.

For countertops, consider surfaces that are easily cleaned and that won’t readily show burn marks if hot pots get put down on them or show stains if something is spilled on them. Choices include:

  • Granite is always a good choice (we are the Granite state after all), but since granite gets hot in the sun, use it in shaded areas. If you must use it in the sun, choose a light color.
  • Quartz is another popular choice for countertops in indoor kitchens, but it will yellow in the sun and can’t stand up to our freeze/thaw cycles, so damage can occur.
  • Concrete is a good option and can be beautiful, but keep in mind that it needs to be sealed every couple of years.
  • Soapstone is beautiful in kitchens, but it scratches easily, and any oil will leave a stain.
  • Metal will be too hot to use as a countertop outdoors, and with our humidity and snow, will corrode quickly.

For cabinets, consider building cabinet frameworks out of stonework or masonry that matches your existing masonry or tiles. You can use stainless steel doors and cabinets that are nestled right into the stonework. If you prefer wood, there are many options that work well outdoors too.

At Stephens Landscaping, we’ve helped many homeowners design and plan their outdoor kitchens. We’d love to help you, too. To get started, call 603.707.0630 or email us!

DIY Garden Pathways

Garden Center · Landscape Construction · Landscape Design

Pathways are a beautiful and essential feature of any landscape. Besides laying out a place to walk, they create a path for the wheelbarrow, save surrounding soil from compaction, and divide your garden into distinct spaces. With a bit of creativity, you can build pathways that are both visually pleasing and very practical. Let’s walk through the DIY options and lay out the steps to build them! 

The Mulch Pathway

Mulch pathways are one of the least expensive and simplest pathways to install. The first steps are to mark out the path and dig out some of the soil. Then, lay down some landscape fabric as an extra barrier against weeds, and fill in the mulch. Over time, you’ll need to replenish the mulch and remove any weeds that take root. Still, the mulch path is simple, practical, and a pleasing way to create a passage through the gardenhttps://www.stephenslandscaping.com/2022/12/26/creative-resolutions-for-your-moultonborough-garden-in-2023/.  

Stephens Landscaping Garden Center -DIY Garden Pathways-stone and gravel pathwayStepping Stones

Stepping stones are another versatile DIY option and add charm and character to the garden. One option is to use evenly spaced rectangular or circular stones. Alternatively, natural-shaped flagstones lend a rustic look to your steps. 

No matter your choice, the steps for installation are the same. Mark out a path and place the stones in your preferred arrangement, keeping an equal distance between the center of each stone. Then, dig a place for each step in the ground. Lay down a level base of sand in each hole and tamp down the sand for stability before laying the stones in their final position. To finish, you can plant groundcovers or moss around the stones, which will beautifully frame the stones over time.

Pathways are a beautiful and essential feature of any landscape. Besides laying out a place to walk, they create a path for the wheelbarrow, save surrounding soil from compaction, and divide your garden into distinct spaces.

Gravel Pathways 

Besides mulch, gravel is the next easiest DIY option for smooth transit in the garden. However, to make a lasting pathway that is stable and free of weeds, you’ll want to follow the preparatory steps below. Because gravel tends to spread and get knocked into the surrounding areas, make sure you cut definitive edges, lay down plastic edging, or border the path with stones. 

stephens landscaping garden center - diy pathways -pathway with mulch around stonesFlagstones

As already mentioned, flagstones form beautiful stepping stones. You can also use them in continuous pathways, where the stones are beside each other. These smooth, naturally cut stones create perfect imperfection. They’re durable, long-lasting, and age well over time. Follow the steps below to build a solid foundation for flagstone paths. 

Paving Stones 

Pavers are interlocking bricks that form a solid and stable path. They are sleek, even, symmetrical, and lend a polished look to the landscape. You can choose both the color and the pattern of arrangement. Make sure to follow the steps below for a DIY approach that resists settling and remains level throughout the years. 

Stephens Landscaping Garden Center -DIY Garden Pathways-building a pathwaySteps for DIY Gravel, Flagstone, and Paver Pathways 

When making these types of pathways, you want to ensure you have a solid base. Here’s a quick guide to get you started:

  1. Mark out the path, using string to create straight edges. 
  2. Dig down approximately 6 inches into the ground. Note: a flat head spade comes in handy. 
  3. Fill in the bottom layer with loose stones or pea gravel; tamp them down, and cover with landscaping fabric.
  4. Fill another layer of sand, tamp down the surface, and level it. 
  5. Lay down the pavers, flagstone, or gravel. Tamp down the stones with a mallet to make them level and keep them in place. 
  6. To finish, fill between the cracks of the stones with sand and sweep away any leftovers on the surface.

Building a pathway is well within reach of the DIY gardener. When working with flagstone and pavers, remember to lay a solid base the first time so you don’t end up with sunken and uneven stones in the future. With that in mind, you’ll be well on your way to laying beautiful and functional garden pathways, no matter what style you choose. For more gardening and landscaping tips, feel free to follow us on Instagram or Facebook, or visit us in person in Moultonborough!