Plant Bulbs in the Fall for Spring Blooms

Garden Center

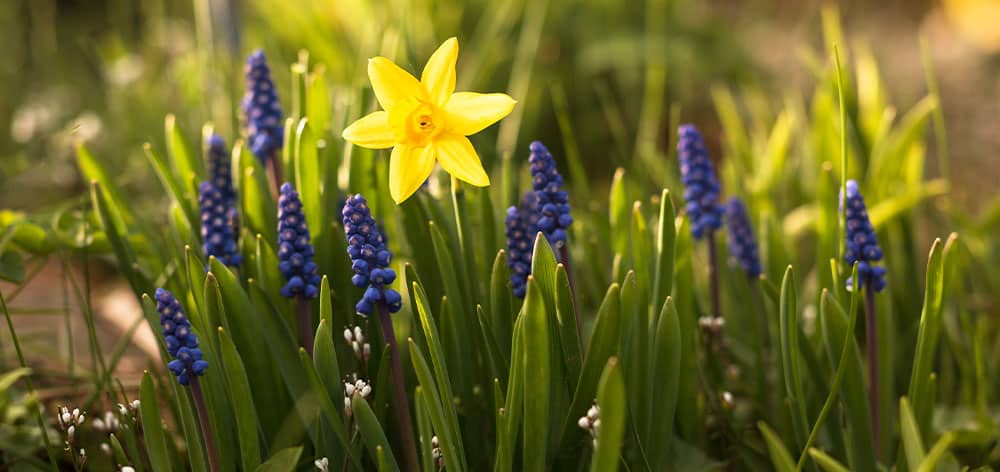
Every year at the end of winter, just when we’ve almost given up on spring, the first bulbs of the year suddenly emerge with fresh flowers. They’re one of the great gifts of early spring, often appearing when everything is still brown. But they can’t surprise us with flowers in the spring unless we take the time to plant them in the fall

Stephens Landscaping Garden Center - New Hampshire - Planting Fall Bulbs for Spring Blooms -flower bulb planting toolsBulbs 101: A Basic Overview

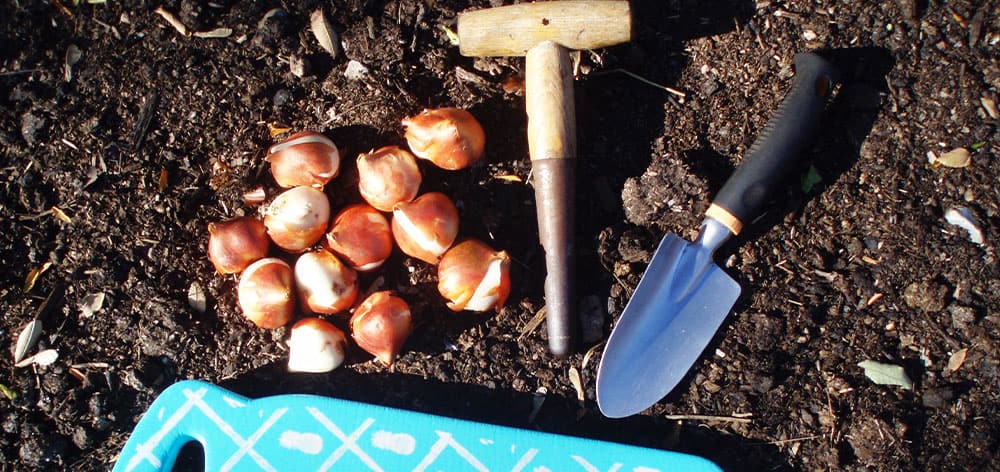
In case you’re new to bulbs or want a quick reminder—bulbs are perennial flowers with onion-shaped roots that emerge for a period of time in the spring or summer before disappearing into the ground until the following year. Crocus, tulips, snowdrops, daffodils, and hyacinths are just a few examples. Spring-flowering bulbs need to be planted in the fall, whereas summer-flowering bulbs can be planted in the spring. 

When to Plant Spring-Flowering Bulbs 

Just as the harvest is underway and we’re enjoying the produce of a long summer, we also need to be thinking about planting bulbs. Once the temperatures have cooled to 50-60℉, it’s high time to put bulbs in the ground. Ideally, you want them buried at least 6 six weeks before the ground freezes, so they have time to settle in and do some rooting before winter.

Stephens Landscaping Garden Center - New Hampshire - Planting Fall Bulbs for Spring Blooms -tulip bulbs in soilHow to Plant Bulbs

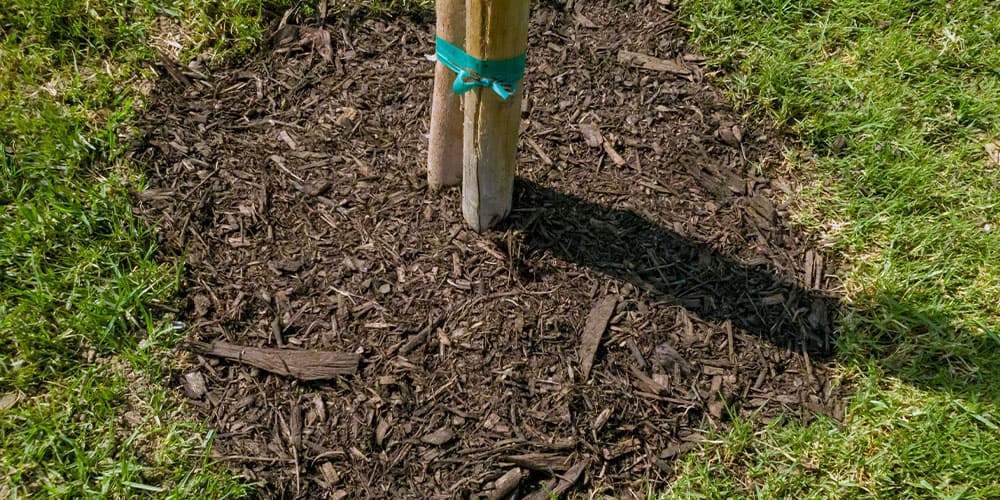
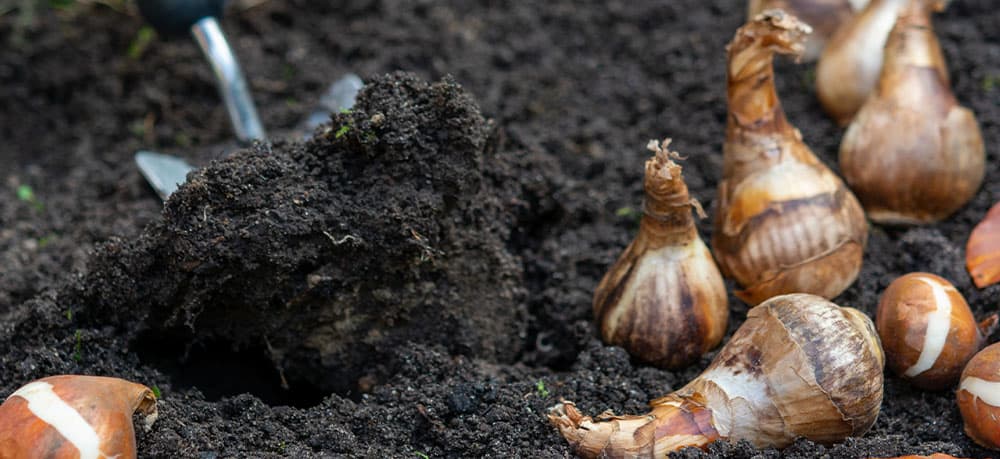
A good rule is to plant them 2-3 times as deep as the height of the bulb. Remember to place the pointy side up, and feel free to work some compost, peat, or other organic matter into the soil to help with nutrients and drainage. Gently tamp down the soil after you cover them, water them once as a finishing touch, cover them with mulch, and say goodbye until spring. 

Note: Don’t forget to mark their location in your garden journal so you don’t accidentally dig them up when you’re planting something else!

Where to Plant Bulbs 

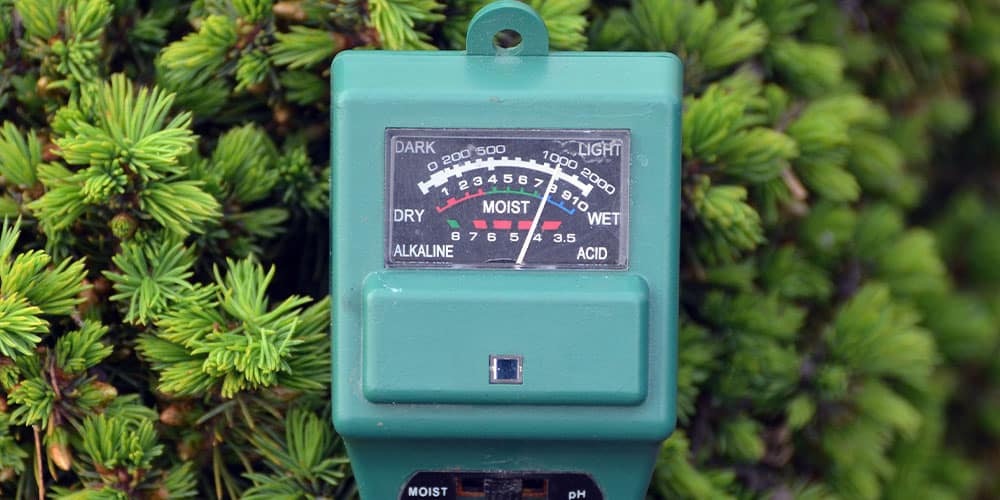
Sunlight requirements differ for the different bulbs, but generally, most need full sun or partial shade. Keep in mind that the early bloomers emerge before the trees have leafed, so you’ll have extra light in the garden. Most bulbs also need well-draining locations to keep them free of root rot.

Stephens Landscaping Garden Center - New Hampshire - Planting Fall Bulbs for Spring Blooms - daffodil and muscariTips for Arranging Bulbs in the Garden 

Planting bulbs where they have the proper growing conditions is only part of the equation. The other half is the fun you can have while designing beautiful displays for the springtime:

  • Plant in Clusters: A single flowering bulb doesn’t have as much impact as a cluster. For best results, plant them in odd groupings of 3, 5, or 7 bulbs. Dig a single hole and plant them together with appropriate spacing.  
  • Plan for Successive Blooms: Not all bulbs flower at the same time. You can plan to arrange bulbs for successive blooming, with later bulbs emerging as early bulbs start to fade. That way, you can enjoy bulbs all the way through the spring.  
  • Layer Bulbs: With their successive bloom times in mind, you can even layer different bulbs as you plant them, kind of like a lasagna. It’s a good way to take advantage of bulbs of different heights, create beautiful combinations, and keep all the space in your garden blooming.  

Stephens Landscaping Garden Center - New Hampshire - Planting Fall Bulbs for Spring Blooms -pruning bulb foliageHow to Prune Back Existing Bulbs 

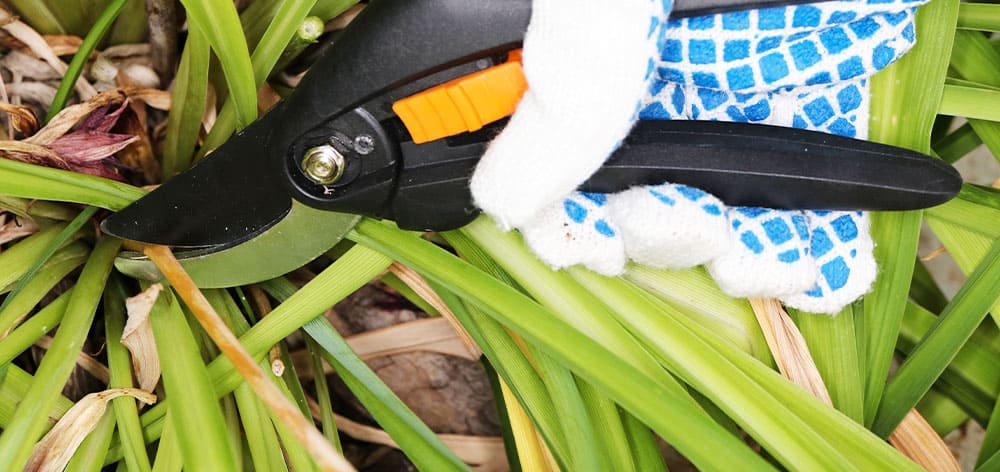
Once the bulbs are done flowering, they’ll start to produce a seed head where the flower was. These should be deadheaded in order to spare the plant from putting energy towards seeds. The leaves will remain green for 6-8 weeks after flowering and should be left alone, as they are replenishing the energy stores in the bulb for the year. Once the leaves turn yellow, you can cut them back to the ground. 

Spring is not the only time for planting flowers. In fact, fall is the all-important time for planting spring bulbs. Bury a few of these gems now, and you’ll enjoy a wealth of flowers next spring! 

To see our selection of bulbs, feel free to visit our garden center in Moultonborough, and don’t forget to follow us on Facebook or Instagram for updates!

Azaleas vs. Rhododendrons

Garden Center · Planting

Azaleas and rhododendrons are two of the most celebrated shrubs in the gardening world. With more similarities than differences, it’s easy to confuse the two. Learning their differences can help you select the best shrub for your landscape, allow you to care for their unique needs, and deepen your appreciation for the wide variety of these beautiful plants.   

Stephens Landscaping Garden Center-Moultonborough-pink blooming rhododendronBotanical Origins

Both of these species come from the larger rhododendron genus, which explains their close similarities. In that sense, you can say that azaleas are a type of rhododendron. Look at the botanical name of azaleas, and you’ll even find the genus rhododendron. But when common gardeners refer to “rhododendrons,” they’re not talking about the whole genus but rather a specific species of shrub, which are also called rhododendrons, and are different from azaleas.   

Azaleas vs. Rhododendrons: The Main Differences 

Below are some details that can allow you to identify and distinguish these shrubs:

Stephens Landscaping Garden Center-Moultonborough-azalea vs. rhododendron blooms

  • Flower Shape: Rhododendrons usually have bell-shaped flowers, whereas azaleas have tubular or trumpet-shaped flowers. 
  • Number of Stamens: Rhododendron flowers have ten stamens, whereas azalea blossoms have five to six stamens. 
  • Flower Clusters: Rhododendrons feature clusters of flowers, whereas azalea flowers are each attached to single stems, but they appear as clusters because they’re close together.
  • Flower Color: Generally, azaleas feature a wider variety of colors, ranging from white to red, orange, yellow, cream, purple, pink, and anything in between. By contrast, rhododendrons have a more classic palette of white, pink, purple, red, and sometimes yellow.

Stephens Landscaping Garden Center-Moultonborough-azalea vs. rhododendron foliage

  • Type of Leaves: Azaleas are usually deciduous but may be evergreen, depending on the climate. In contrast, rhododendrons are mostly evergreens.
  • Leaf Shape: Azaleas usually have small, thin, oval-shaped, or pointed leaves, whereas rhododendrons have larger, thicker, leathery, paddle-shaped leaves. 
  • Blooming Time: Azaleas usually bloom in April, with some “repeat blooming” varieties having a second bloom time in the summer. Most rhododendrons bloom later in the spring, after azaleas. 

Common Features of Azaleas and Rhododendrons 

Despite their minor differences, both groups of shrubs dazzle your landscape in the spring with their profusion of colorful flowers. Both personalities exude elegance, grace, color—and lots of it! It’s rare for evergreen shrubs, like many rhododendrons (and some azaleas), to display such incredible blooms. The deciduous varieties are no less stunning.    

Stephens Landscaping Garden Center-Moultonborough-azalea vs. rhododendron purple blooming How to Grow Azaleas and Rhododendrons

With their close heritage, both types of plants share many common growing preferences, including:

  • Soil: Both azaleas and rhododendrons need acidic soil to flourish, with a pH of around 5 to 5.5. If your soil is too alkaline, you can lower the pH by adding special fertilizer for acidic-loving plants or mixing in sulfate. 
  • Light: Both types of shrubs grow in full sun or partial shade. Ideally, they’ll receive the soft rays of morning light and dappled shade or filtered sunlight in the afternoon. 
  • Moisture: Azaleas and rhododendrons thrive with evenly moist, well-draining soil. A layer of mulch helps keep the moisture in, especially for newly planted shrubs. Avoid planting in areas with poor drainage where they’ll get waterlogged. 

Stephens Landscaping Garden Center-Moultonborough-azalea vs. rhododendron shrubWhen to Plant Azaleas and Rhododendrons 

These plants are pretty flexible with planting, but we recommend planting before late autumn. Planting by mid-fall will ensure your plant has time to establish strong roots before winter and prepare to take on the chilly winter months. As long as they have time to settle in before the cold, you can plant these whenever suits you best!

Visit us at Stephens Landscaping Garden Center to see the differences between azaleas vs. rhododendrons for yourself! At the end of the day, both of these spring bloomers are cherished around the globe for their exuberant display of flowers, and you can enjoy them both right in your home landscape. Follow us on Facebook or Instagram for more!

When to Plant Trees and Shrubs

Garden Center · Planting

Trees provide lasting beauty and countless benefits for your property, like fresh air, shade, and a source of wildlife habitat, fruit, and flowers. But planting a tree can be stressful for the tree itself. To set your new tree up for success, it’s essential to choose the best time for planting and support it with proper planting techniques!   

When is the Best Time to Plant Trees?

The best time for planting trees and shrubs is when they are dormant in the early spring before leafing out or in the autumn after leaf drop but before the hard freeze. Planting them during dormancy reduces the stress they experience during transplanting and allows them to develop roots during the fall and early spring. 

That said, planting trees also works well anytime in the cool autumn season and in spring before hot weather arrives. It’s impossible to plant during the winter when the ground is frozen. The summer also presents a challenge, as heat makes it very difficult for new trees to settle in and get comfortable. Although planting in the summer is harder on the trees, it is still possible to do so, as long as you commit to keeping your tree well-watered.   

Stephens Landscaping Garden Center-Moultonborough-When to Plant Trees and Shrubs-gardener holding a shrubWhen to Plant Spring Flowering Shrubs and Trees   

The fall is the best time to plant spring-flowering shrubs and trees, like forsythia, lilacs, and crape myrtles, because you won’t be disturbing their blooming cycles. Plant them in the fall, and you’ll get to enjoy their blossoms the following spring. 

When to Plant Conifers

The very best time to plant conifers is in the early spring, after the ground thaws. The refreshing rains and cool spring weather give them ample time to take root before the summer heat sets in. 

The fall is the second-best time to plant conifers. It will give them both the autumn and spring to set roots before next year’s summer heat. Just remember to water them generously every week until the ground freezes and protect them over the winter with a layer of mulch. 

Stephens Landscaping Garden Center-Moultonborough-When to Plant Trees and Shrubs-proper hole dug for planting a treeTips for Successful Tree Planting 

1. Choose the Right Location: For the best long-term success, start with a location with the right light and soil conditions for your specific tree and enough space for the tree to grow. 

2. Dig Twice as Wide: Help your tree root through the surrounding soil by digging your hole twice as wide as your new tree’s root ball and a little deeper than necessary.

3. Plant at the Proper Height: Take care to plant the tree at the proper depth. Backfill the hole before planting, as necessary, to ensure the tree is neither too deep nor sticking out above the ground. The trunk flare at the base of your new tree’s trunk should be flush with the surrounding earth.

4. Supplement with Biotone: Biotone is a fertilizer that encourages root growth. You can add it to the hole of the tree at the time of planting.

5. Straighten the Tree: Step back and look at the tree from several angles to ensure the trunk is straight, and adjust the tree’s position until it is. It’s difficult, if not impossible, to straighten the tree after planting.

Stephens Landscaping Garden Center-Moultonborough-When to Plant Trees and Shrubs-mulched tree newly planted

6. Mulch Your New Tree: Add 2-3 inches of mulch around the tree well to keep moisture in and protect it over the winter. Remember not to mound the mulch around the base of the trunk, and keep the mulch a few inches away from the trunk to prevent any rotting of the tender, young bark. 

7. Water and Water Again: Water the new tree generously after planting and continue to water every day for 1-2 weeks. After two weeks, continue watering every 2-3 days, and water at least weekly in the fall until the ground freezes. If in doubt, check the moisture level below the mulch. If the soil is dry, it’s time to water. If you’re going away on holiday, set your sprinkler on a timer, or ask a neighbor to help with watering

As the temperatures cool down this fall, it’s one of the best times to plant new trees and shrubs in your landscape. Visit our Moultonborough, New Hampshire garden center to view our selection, and follow us on Facebook or Instagram for more updates! 

How Well Do You Know Your Soil?

Garden Center

As gardeners, we often focus on the beautiful flowers and plants above ground, but what’s going on in the soil is essential to everything else. This living layer of earth is where the plants get their stability, water, and nutrients to grow. It’s worthwhile to understand the different types of growing mediums, learn which ones are best for which plants, and discover ways to amend the soil. Here’s what you need to know!  

What Is Topsoil? 

Topsoil is the uppermost layer of soil in a garden, lawn, or anywhere in nature where plants are growing. It’s composed of a rich mixture of minerals, organic material from decomposing plants, and billions of microorganisms. Topsoil is essential for biological activity on the planet, as well as a healthy garden. 

The topsoil you find in garden centers is harvested from the top 1-2 feet of soil from new construction sites or areas under development. The rocks are screened out, and it’s packaged for sale. 

Stephens Landscaping Garden Center - How well do you know your soil- filling up raised garden with soilWhat is “Garden Soil”? 

You’ll also find products labeled “garden soil.” This is topsoil enriched with compost, other organic material, or nutrients to benefit specific garden plants. When building a new garden bed, garden soil makes an excellent growing medium, or you can create your own mixture of topsoil, compost, manure, etc. Garden soil is not the best for potted plants as it’s too dense and retains too much moisture, resulting in root rot. 

What is Potting Soil? 

Potting soil is a growing medium best suited for potted plants, both indoors and outdoors. It may or may not contain actual “soil” harvested from the earth, depending on the blend. Most blends include a lightweight mixture of organic materials, like shredded bark, peat moss, and sphagnum moss combined with perlite, vermiculite, or pumice for drainage. The mixtures are sterile, meaning they’re free of pathogens or fungi that could infect the plants.     

Stephens Landscaping Garden Center - How well do you know your soil - prepping seed planting trays with soilDifferent Kinds of Potting Mixes 

Besides regular all-purpose potting soil, you’ll find specific potting mixes designed for the needs of specific plants. Cactus and succulent mixes contain a higher ratio of sand to improve drainage and imitate desert conditions. Orchid mixes contain more shredded bark to mimic the habitat where orchids usually grow. You’ll also find seed starting mixes, which are finer, lighter, and don’t have as much nutrient content as a regular potting mix. 

How to Amend Your Garden Soil 

To amend your garden soil means to add materials to improve nutrients or to fix a problem like poor drainage or unfavorable pH. Generally, if your plants are thriving, you won’t need to worry about amendments other than a yearly addition of compost or manure to replenish nutrients. 

If you see your plants are having a problem, and you suspect it’s a soil issue, it’s worthwhile to have your soil tested to find the proper diagnosis. Your local county extension office can provide a soil test for a minimal fee. 

Stephens Landscaping Garden Center - How well do you know your soil-soil ph test meterAmending for pH 

Proper soil pH is essential for plants as it allows them to absorb nutrients from the soil. If your soil pH is too acidic, you can add lime to bring it back to neutral. Or, if your soil is too alkaline, you can lower the pH by adding sulfur. This process should be done in stages, not all at once, so your plants can adjust slowly. 

Amending Soil Texture 

The best soil for most garden plants is called loam, which is neither too dense nor too sandy and is just the right texture for good moisture retention, drainage, and airflow. 

A simple way to test texture is to pick up some soil in your hand and squeeze it. You’ve got good loamy soil if it forms a ball before crumbling away. If it doesn’t form a ball, it may be too sandy. If it compacts into a ball and doesn’t crumble, you could be dealing with dense, clay-based soil. 

Stephens Landscaping Garden Center - How well do you know your soil- planting geranium flowersThe best way to amend either clay or sandy soil is to add organic material, like compost or manure. This helps sandy soil retain moisture and improve density. It also loosens up clay-based soil, allowing more room for air and water to flow through. Plus, overall, compost and manure add essential nutrients and microbial activity that improve any soil type.         

For more information on the best soil for your plants, drop by our garden center in Moultonborough, and keep in touch through Facebook or Instagram

How to Grow Coral Bells

Garden Center

Coral Bells, or Heuchera, are well-loved perennials that bring zest to the shady areas of your garden. They’re recognized by their mounded habit, long stalks of bell-shaped flowers, and amazing array of colored leaves. On top of that, they’re very hardy and easy to grow—here’s how!  

The Backstory of Coral Bells 

With such a colorful and unique appearance, it’s hard to believe coral bells are native to North America, but it’s true! In fact, they were one of the first plants to be brought to Europe from North America in the 1600s. In a guidebook, you’ll likely find them under their alternative name, alumroot. 

Coral bells naturally have colorful leaves, but careful breeding has produced a stunning selection of varieties, including lime green, variegated green, purple, pink, and shades of pink-orange coral. The tiny flowers are usually pink or white and dangle from tall spikes above the mound of leaves.   

Stephens Landscaping Garden Center- Moultonborough- How to grow coral bells-shade planted garden with coral bells plantSunlight for Coral Bells

Coral bells are most at home in part-shade. They will grow in full sun; however, the color of the leaves may fade or get scorched. You can prevent scorching by giving them extra water if they are planted in full sun. It’s best to plant them in part shade, where they’re at their happiest. 

How to Water Coral Bells 

Ideally, coral bells will have consistently moist soil. They thrive with about an inch of water per week. Mature plants can tolerate drought, but due to their shallow roots, they can only withstand so much. During hot, dry stretches, water them every other day to keep them happy. 

Stephens Landscaping Garden Center- Moultonborough- How to grow coral bells-green and brown coral bell foliage

Soil for Coral Bells 

Soil rich in organic matter is ideal for growing coral bells. Good drainage is also essential, as their crowns can easily rot when sitting in a damp, shady area. They prefer the normal range of garden soil pH, which is about 6.0-7.0.    

How to Fertilize Coral Bells

Coral bells are not heavy feeders. They do well with a half-inch of compost in the spring or a light application of a slow-release, organic fertilizer. Avoid heavy fertilizing, as it can inhibit flower growth. 

Seasonal Care

  • Spring Maintenance: For routine maintenance, cut back last year’s leaves around the mound to let the new growth come through. The new leaves will fill in quickly.

  • Summer Deadheading: The colorful leaves are the greatest appeal of coral bells. Nevertheless, the small, airy flowers are beautiful as well. They bloom from late spring to summer and continue for 2-3 weeks, sometimes repeating a second bloom cycle later in the season. To extend the bloom time, you can deadhead the spent flowers. Once the flowering has finished, cut the stalks back to promote the overall leaf growth of the plant. 

Stephens Landscaping Garden Center- Moultonborough- How to grow coral bells-planting a division of coral bells perennial plantHow to Propagate Coral Bells 

You can propagate coral bells by dividing the root clumps in the spring or fall. Sometimes small offsets will grow around the mother plant, which can be carefully divided and propagated to a new area. Remember to plant the new divisions quite shallow when replanting, with the soil covering the roots. 

Troubleshooting Coral Bells 

  • Winter Heaving: The shallow root systems of coral bells sometimes make them vulnerable to lifting out of the ground during the frost-thaw cycles of late winter. If this happens, you can transplant them into a pot until the soil thaws enough to dig them back into the garden. If it’s a recurring problem, protect them over the winter with a layer of mulch around the crown.
  • Common Pests: These hardy perennials are most often pest-free. However, fungal infections like powdery mildew or rust can occur. Potential insects that may attack them include weevils and foliar nematodes. The larvae of these pests can be spotted and removed by hand before they become a problem.  

Stephens Landscaping Garden Center- Moultonborough- How to grow coral bells-shade planted garden with hosta coral bells and fernsWhere to Plant Coral Bells? 

Their colorful foliage makes coral bells ideal for bringing life to the semi-shaded areas of the garden. They can be planted beneath shade trees, along garden borders, or in combination with other perennials, like shade-loving hostas. The varied colors make them great partners to echo blooms of other perennials, or to bring new colors to the garden in general. 

To learn more about how to grow coral bells, feel free to visit our garden center in Moultonborough, New Hampshire, and follow us on Facebook or Instagram!